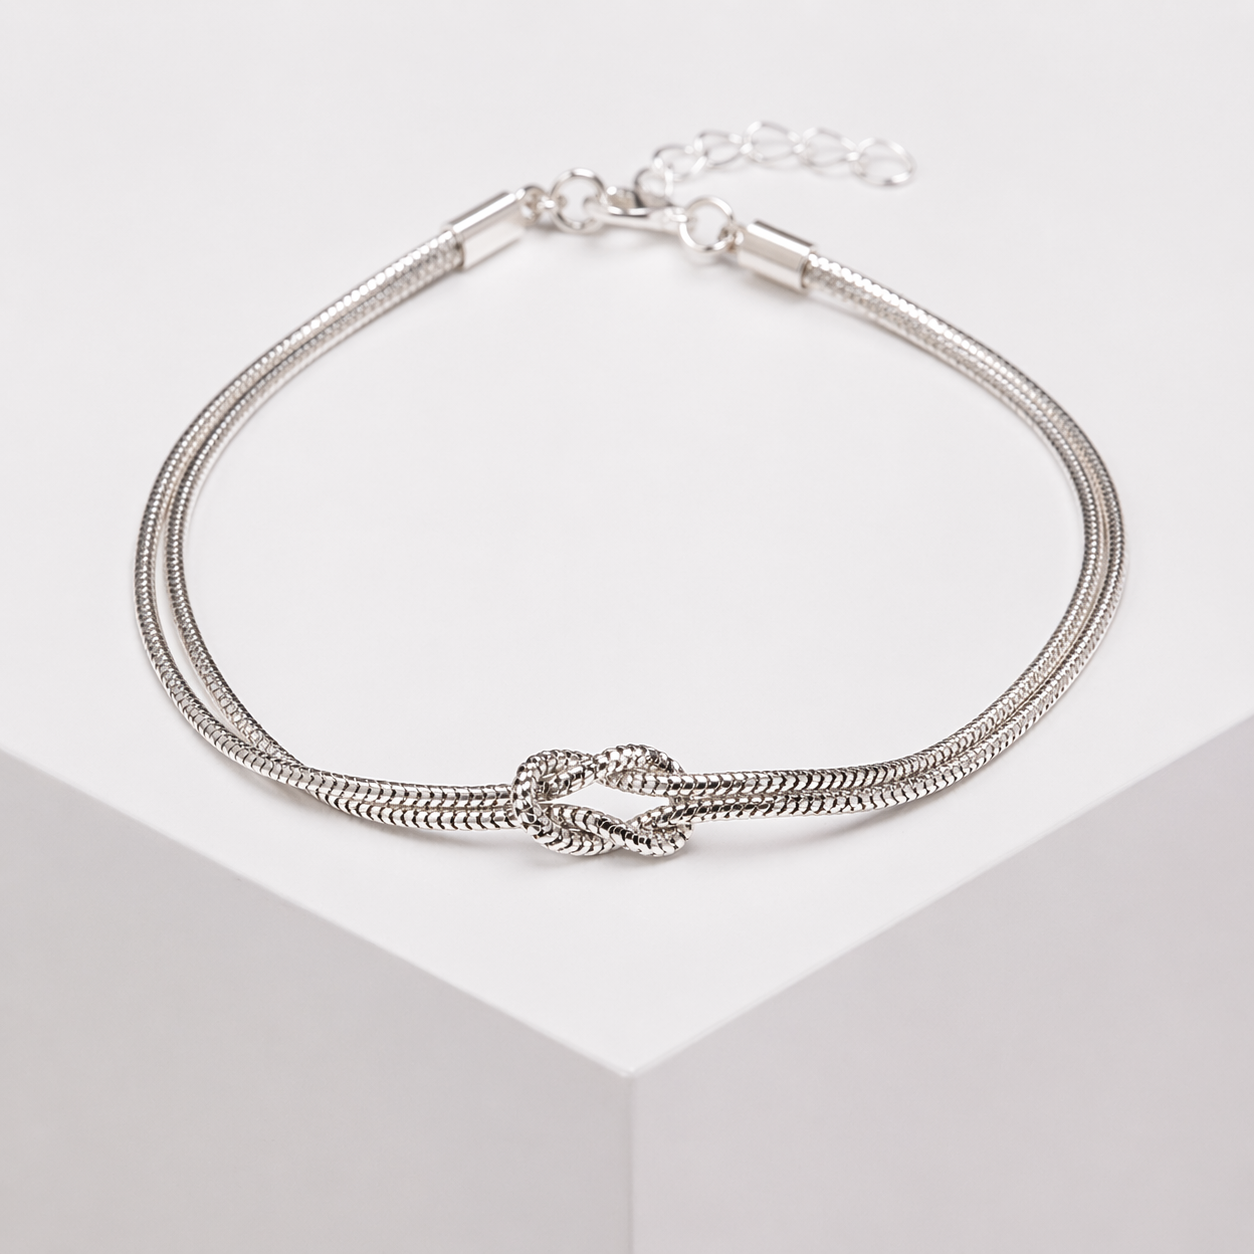
Tying the Knot Bracelet Recipe
How To Make A Simple snake chain knot Bracelet
If you don’t already have a bridesmaid piece in your collection… this is a little nudge 😀

My little knot bracelet became one of my bestsellers in my wedding collection. It’s thoughtful, a little bit sentimental, and it’s wonderfully simple to put together. Perfect if you’re making for your own wedding, or if you are looking to add a reliable, always-sells piece to your own jewelry collection. Minimal effort, maximum ‘wow factor’. Which, let’s be honest, is exactly what we’re after.
This little knot bracelet also works beautifully as a friendship bracelet… which, as it turns out, is rather good for sales too.
| Skill level: Easy | Time: 10 Minutes | Style: Classic Wedding |
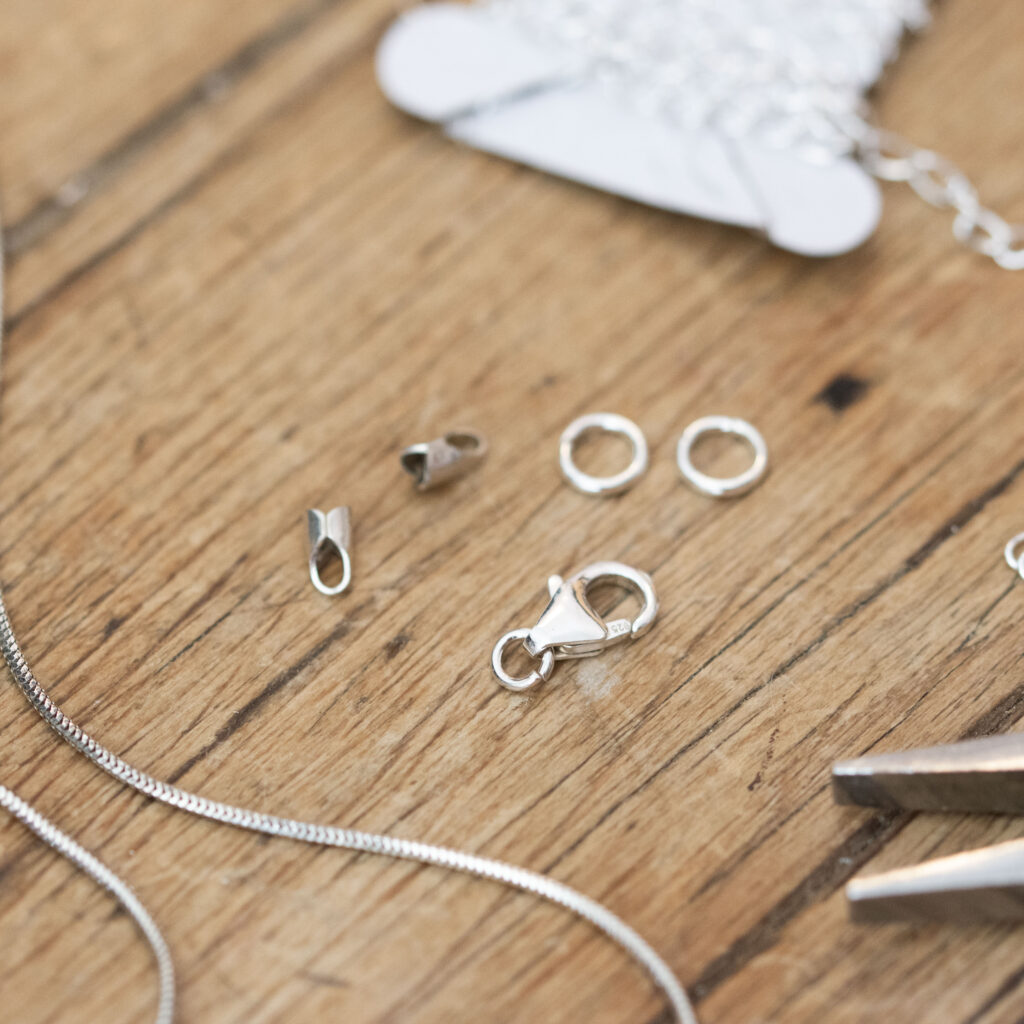
Ingredients
Sterling silver 925
I’ve used sterling silver here for a beautiful, long-lasting finish, but you can easily switch to stainless steel or silver-plated if you’d prefer a more budget-friendly option to get started or practice.
1.2mm Thick Sterling Silver Snake Chain
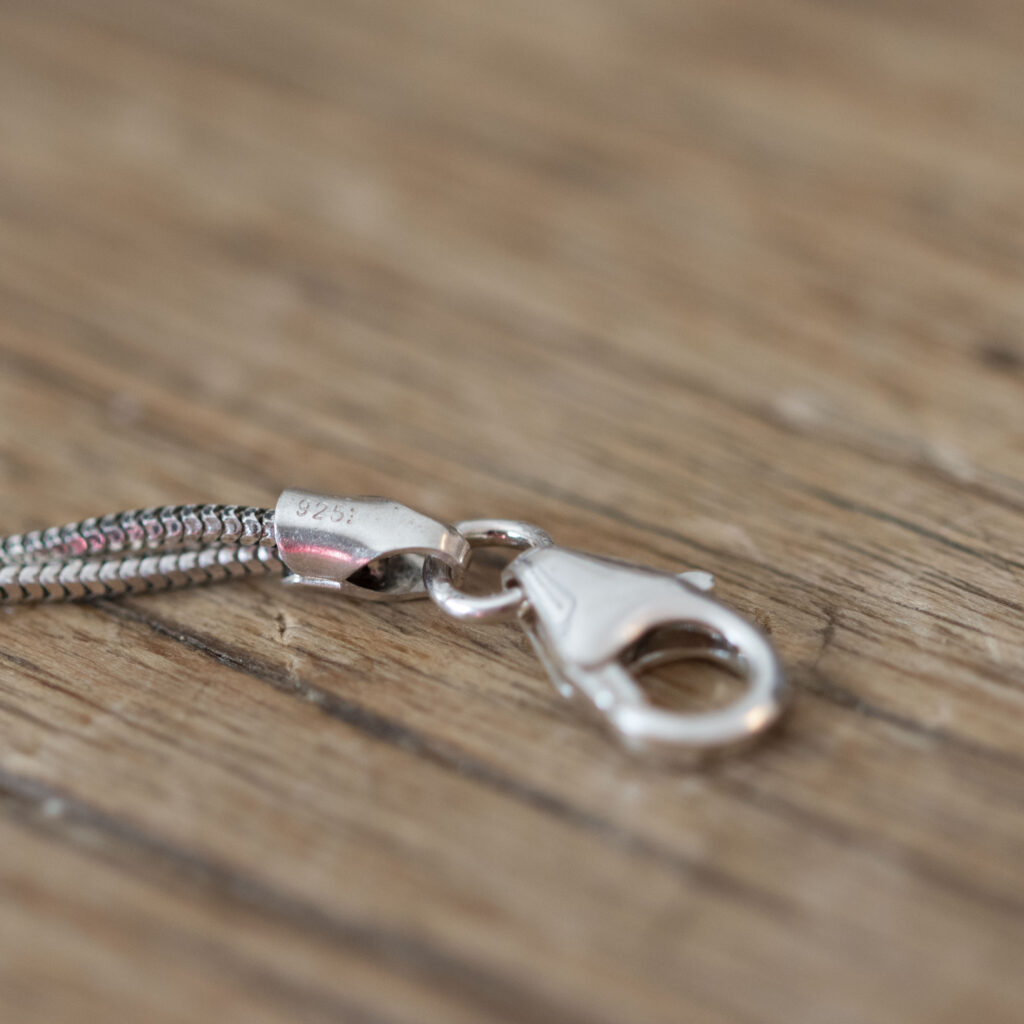
x1 Sterling Silver 10mm Lobster Clasp
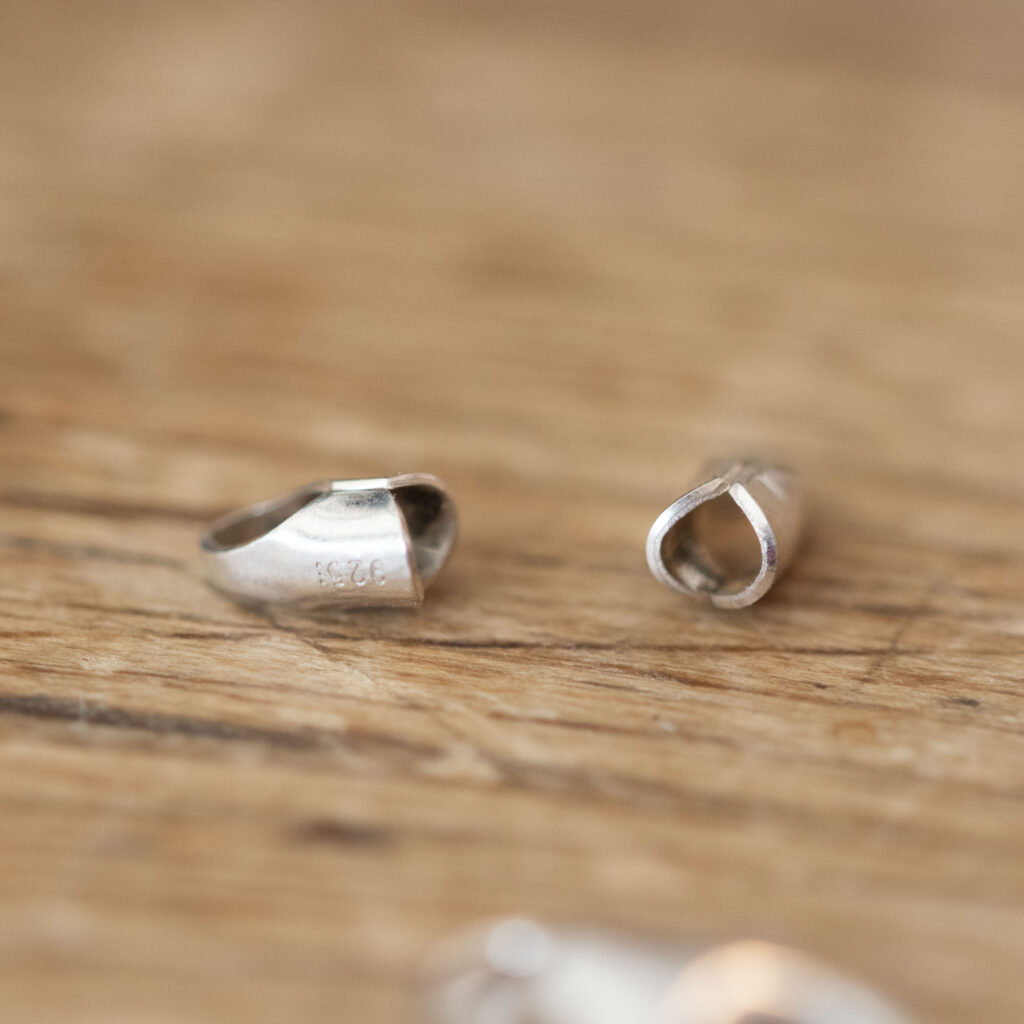
x2 Sterling Silver 2.5mm End Caps
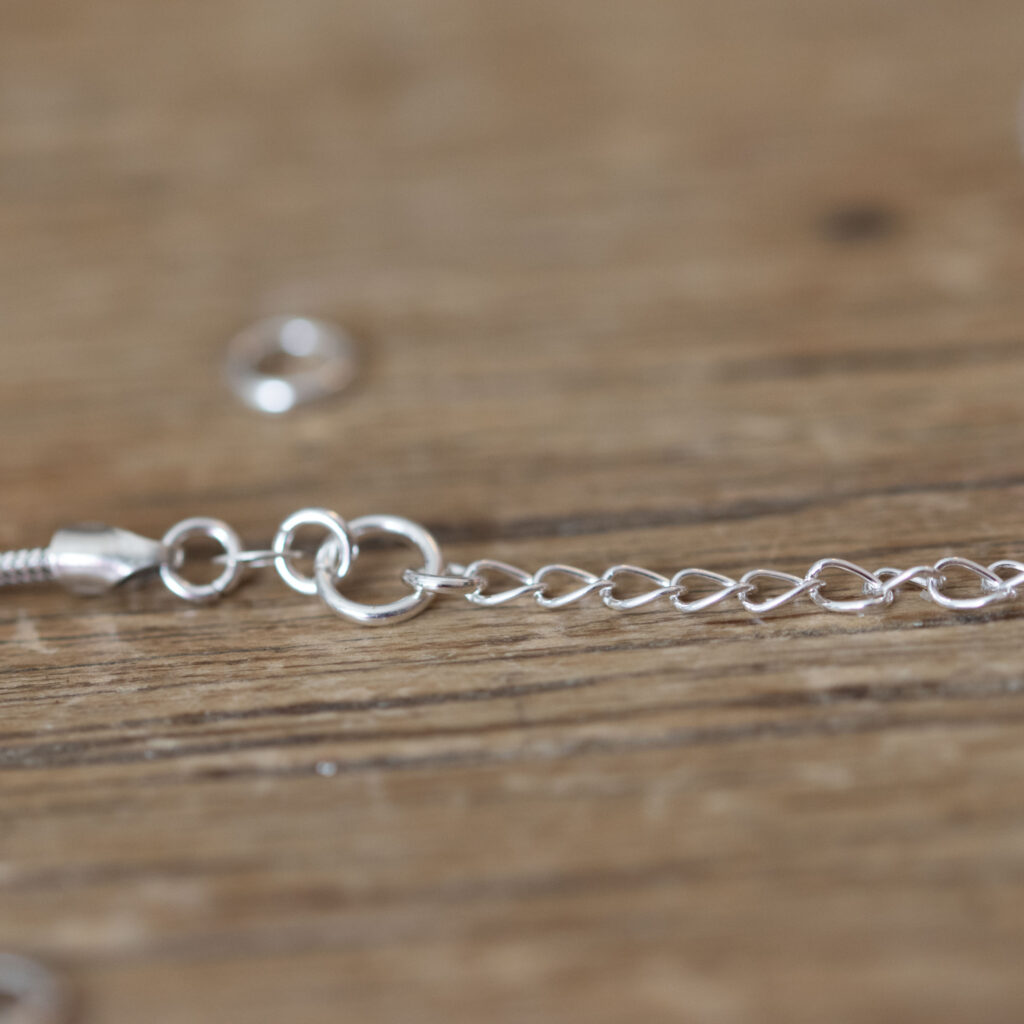
x1 Sterling Silver 6mm Open Jump Ring (18 or 20 gauge)
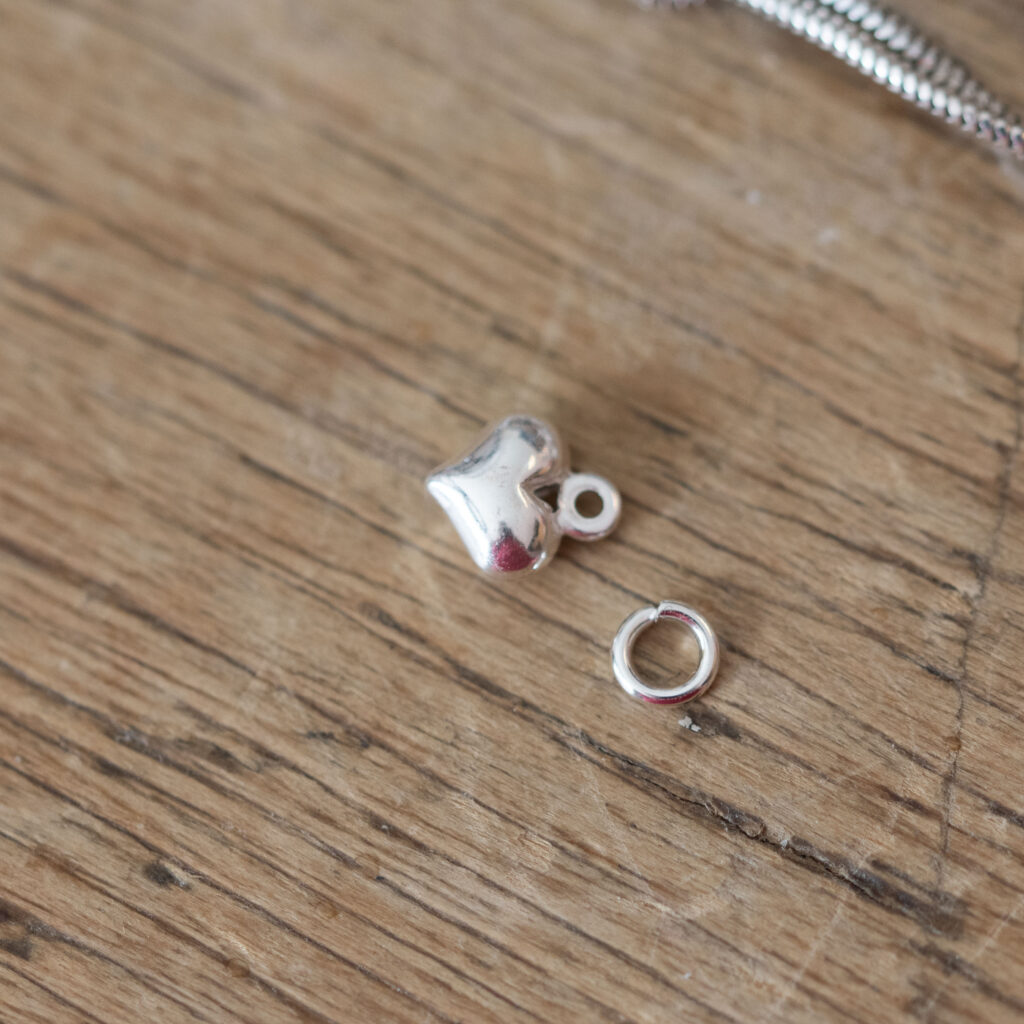
x2 Sterling Silver Jump Rings 4mm (20 gauge)
x1 Sterling Silver 925 Tag (optional)
x1 Sterling Silver Extender Chain (these already have the 925 tag included)
x1 Sterling Silver Little Heart Charm
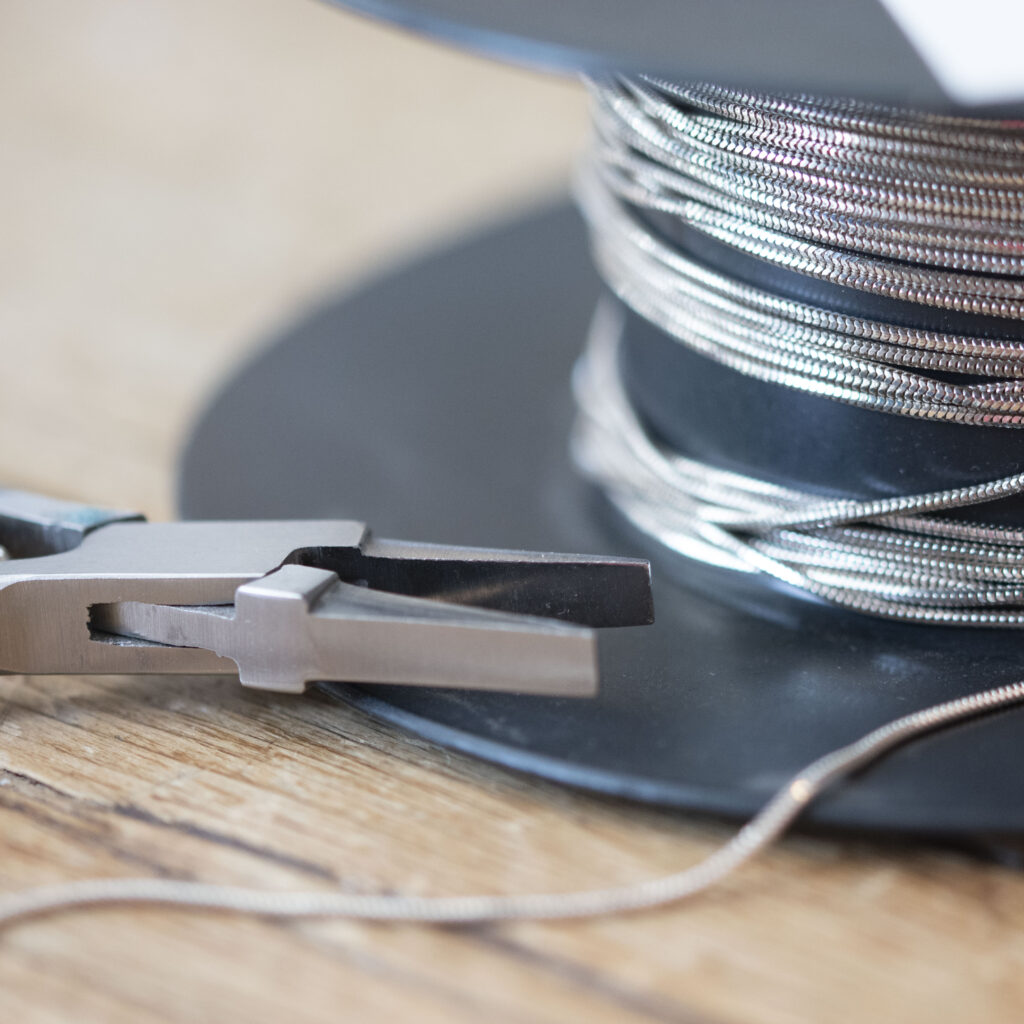
Tools
Square Nose Pliers
High Strength Glue
Cutters
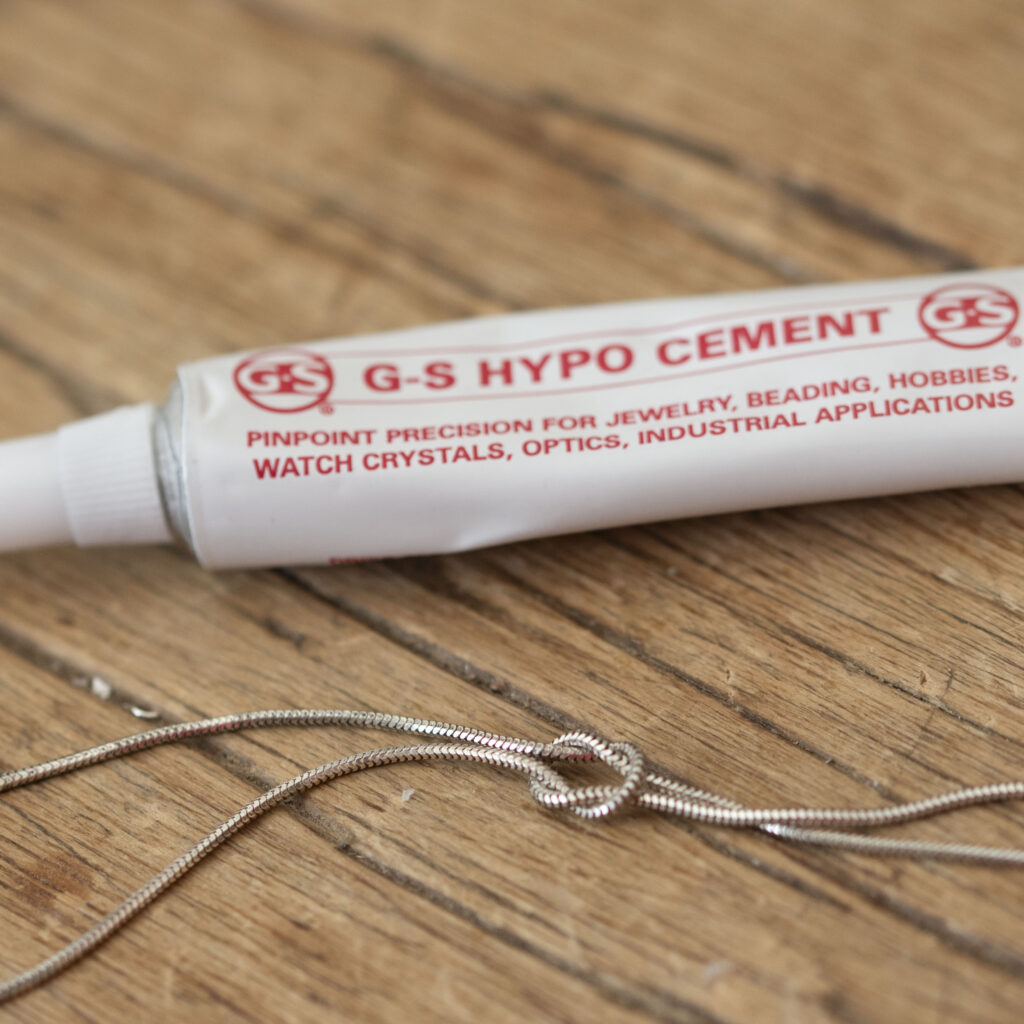
G-S Hypo Cement Glue
Brass jewelry stand
1. Grab All Your Ingredients
Start by cutting your snake chain. I make my bracelets 17cm and add an extender chain, giving the bracelet the capacity to fit many wrist sizes. So for a 17cm bracelet you need to cut two 19cm lengths of snake chain with your cutters.
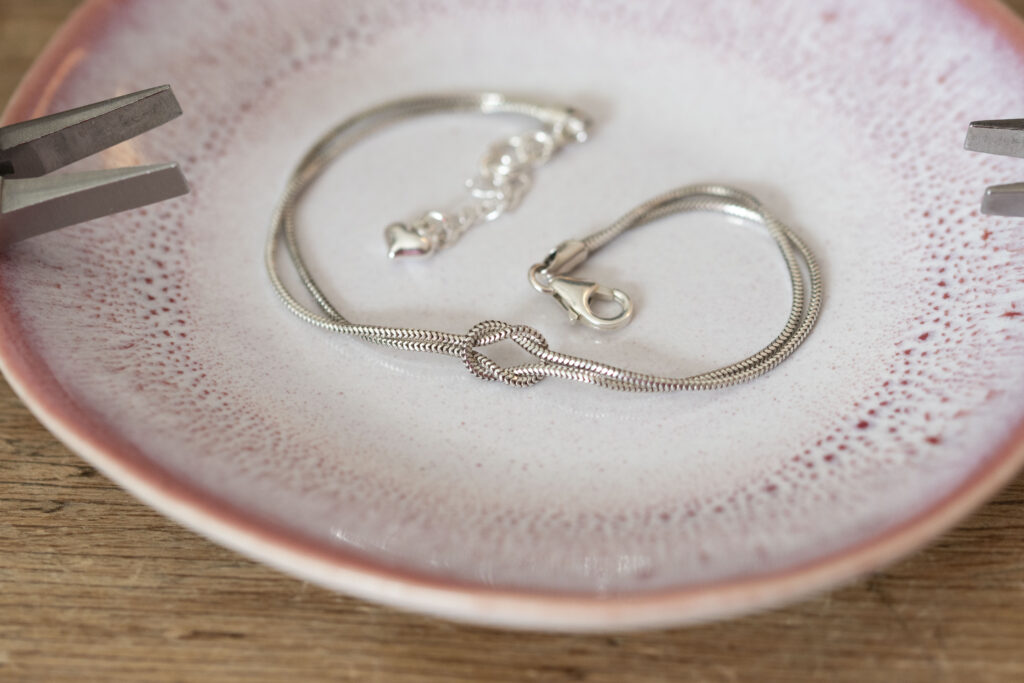
2. Make Your Knot
Take your snake chain and loop them. Create two loops.
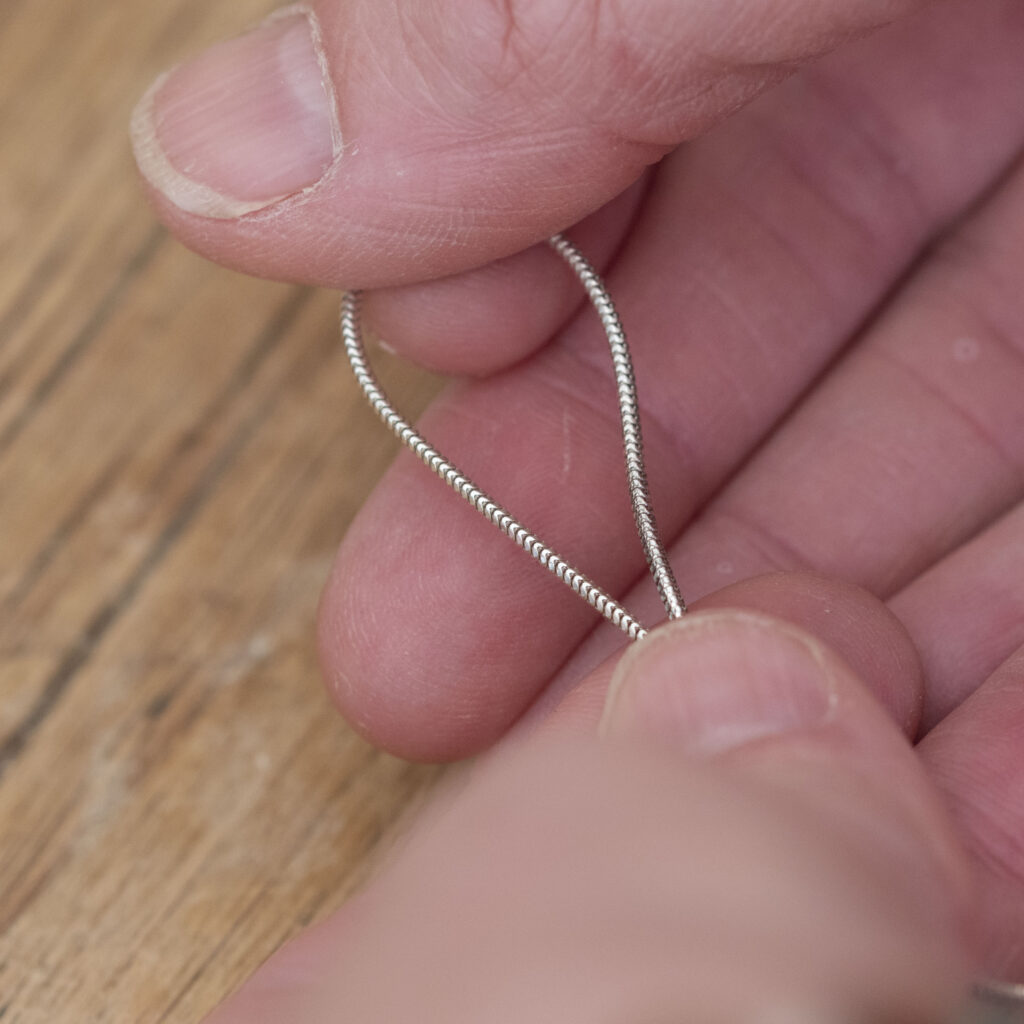
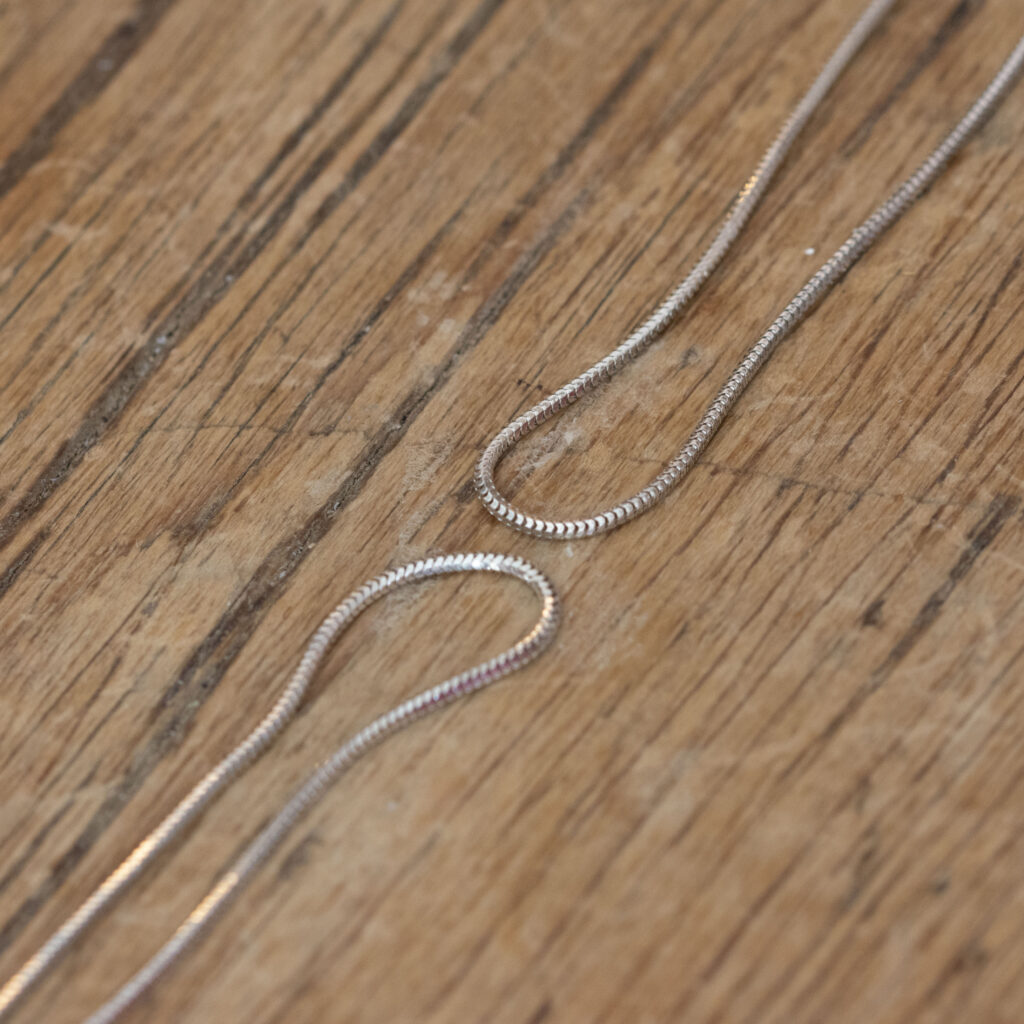
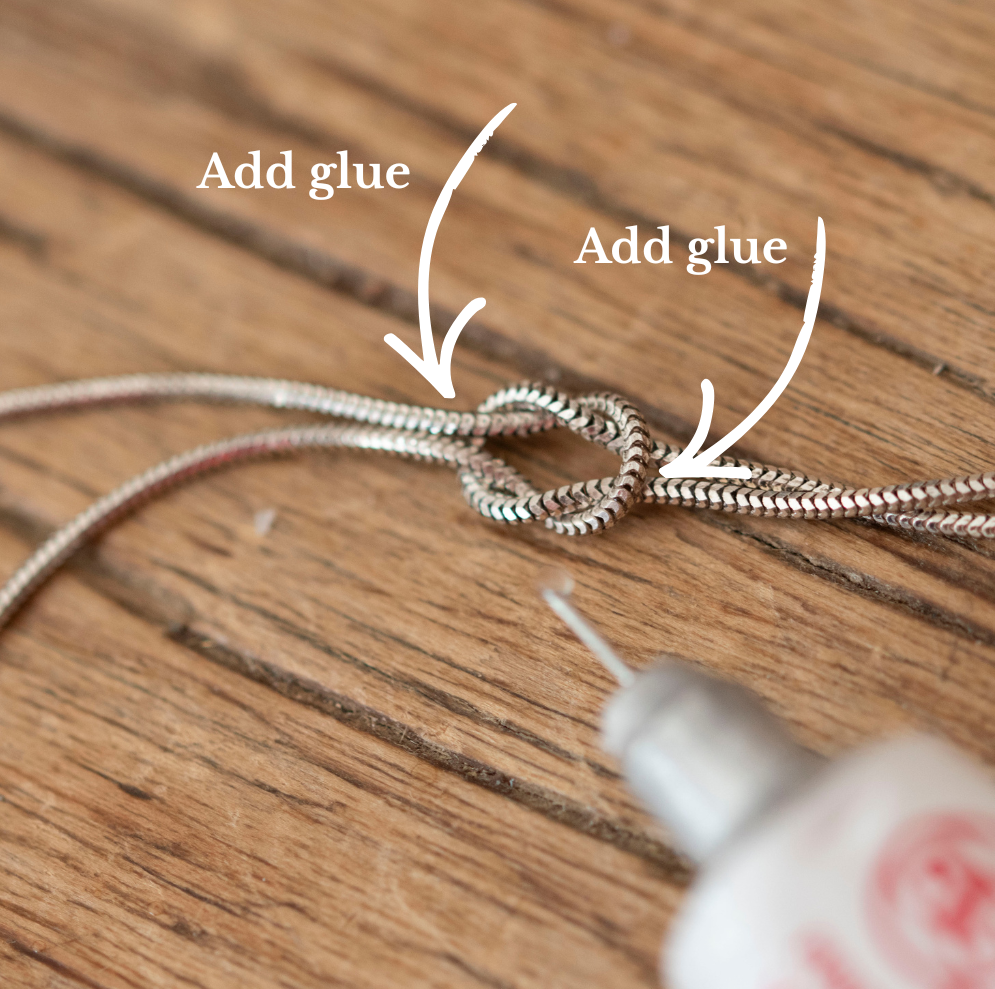
Lay your two loops out as shown below, then pull them together to form a neat, tight knot. Check both ends are even so your bracelet finishes nicely balanced.
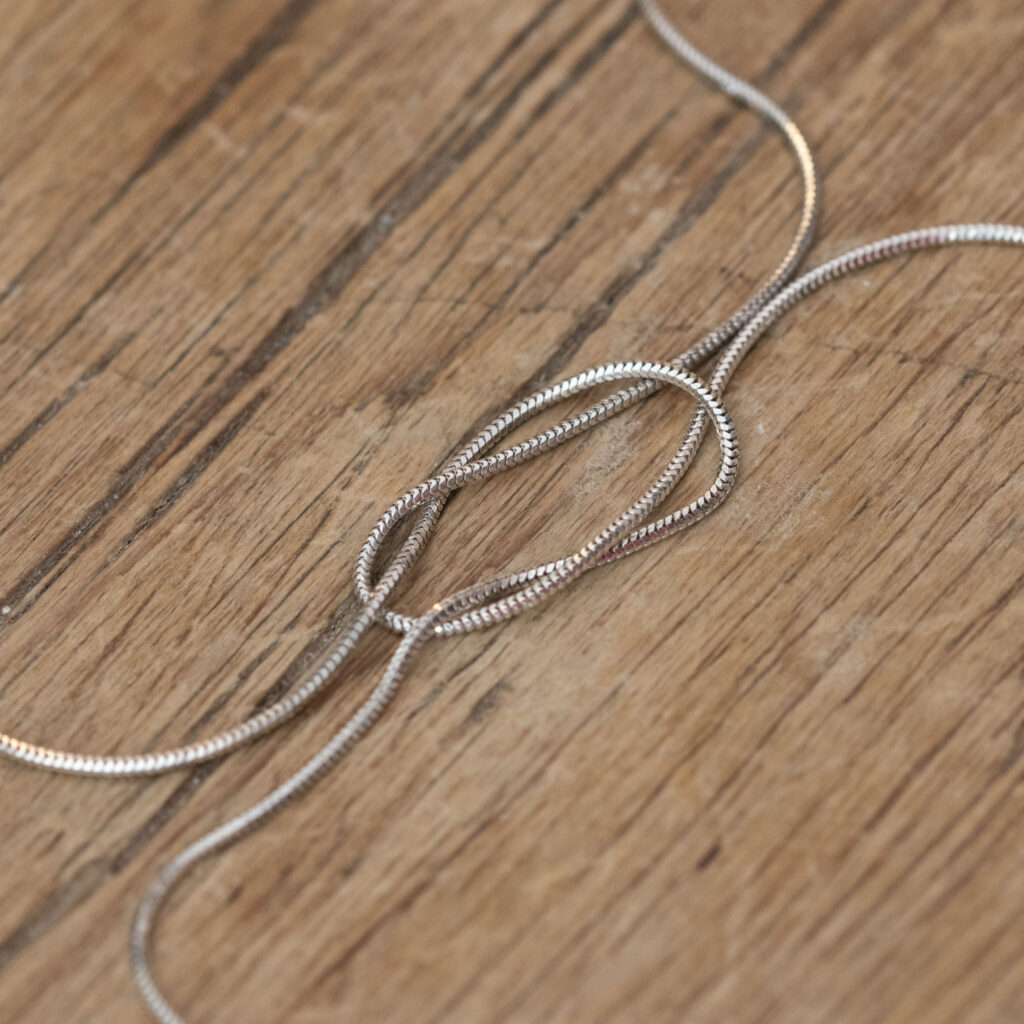
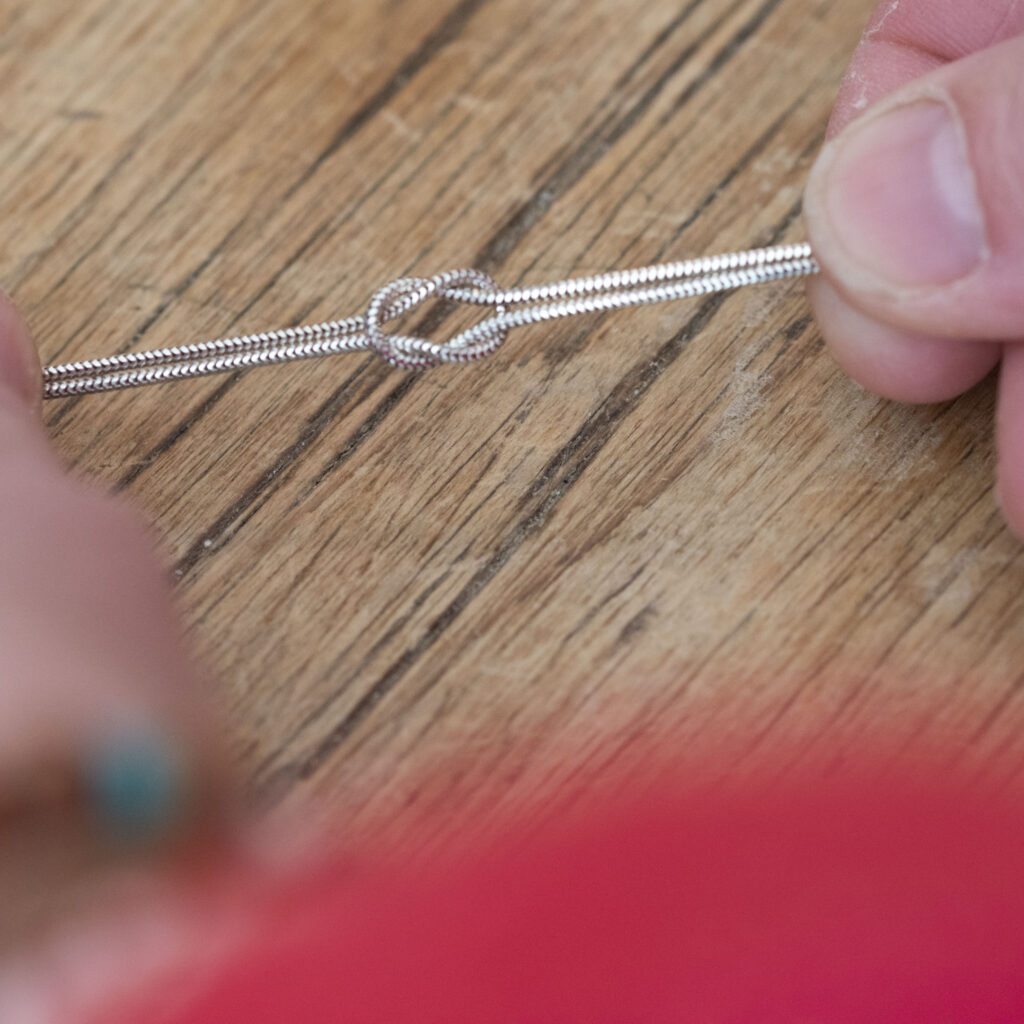
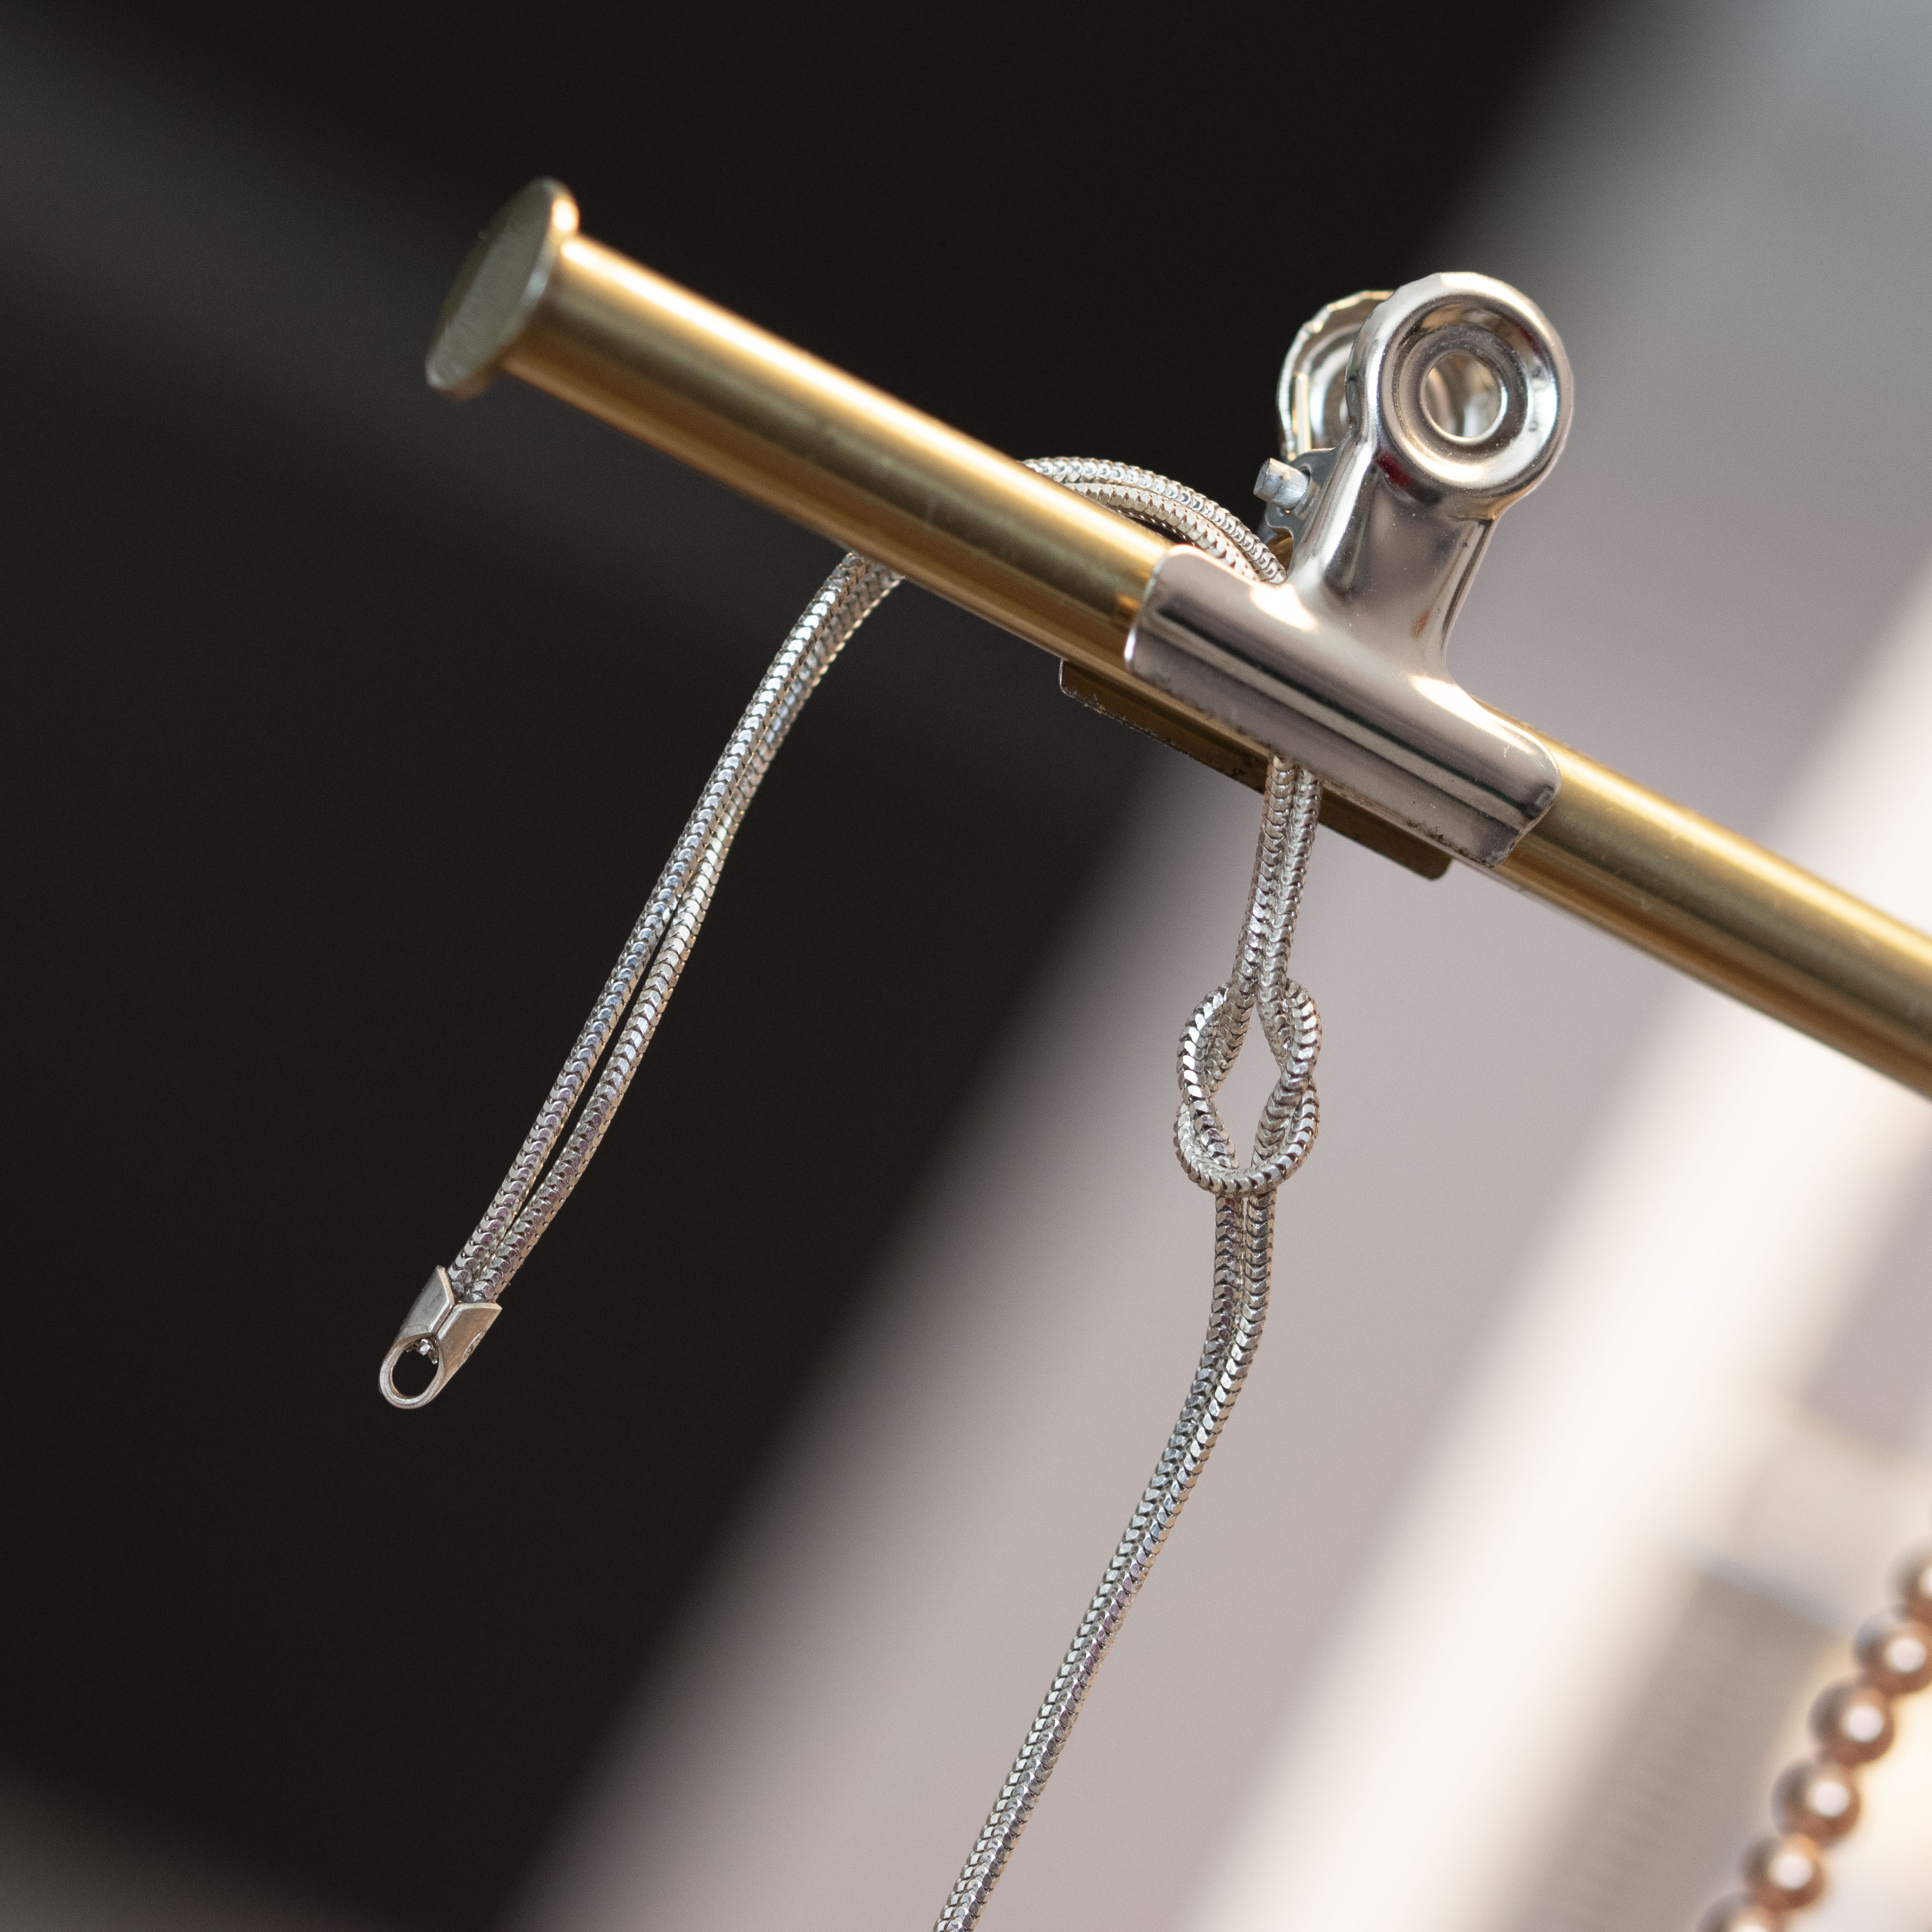
Using your flexible G-S Hypo Cement Glue put a teeny tiny amount on the areas specified below just to keep the knot in place. Making sure your knot stays in place. I then leave my snake chain with newly created knot to hang dry overnight.
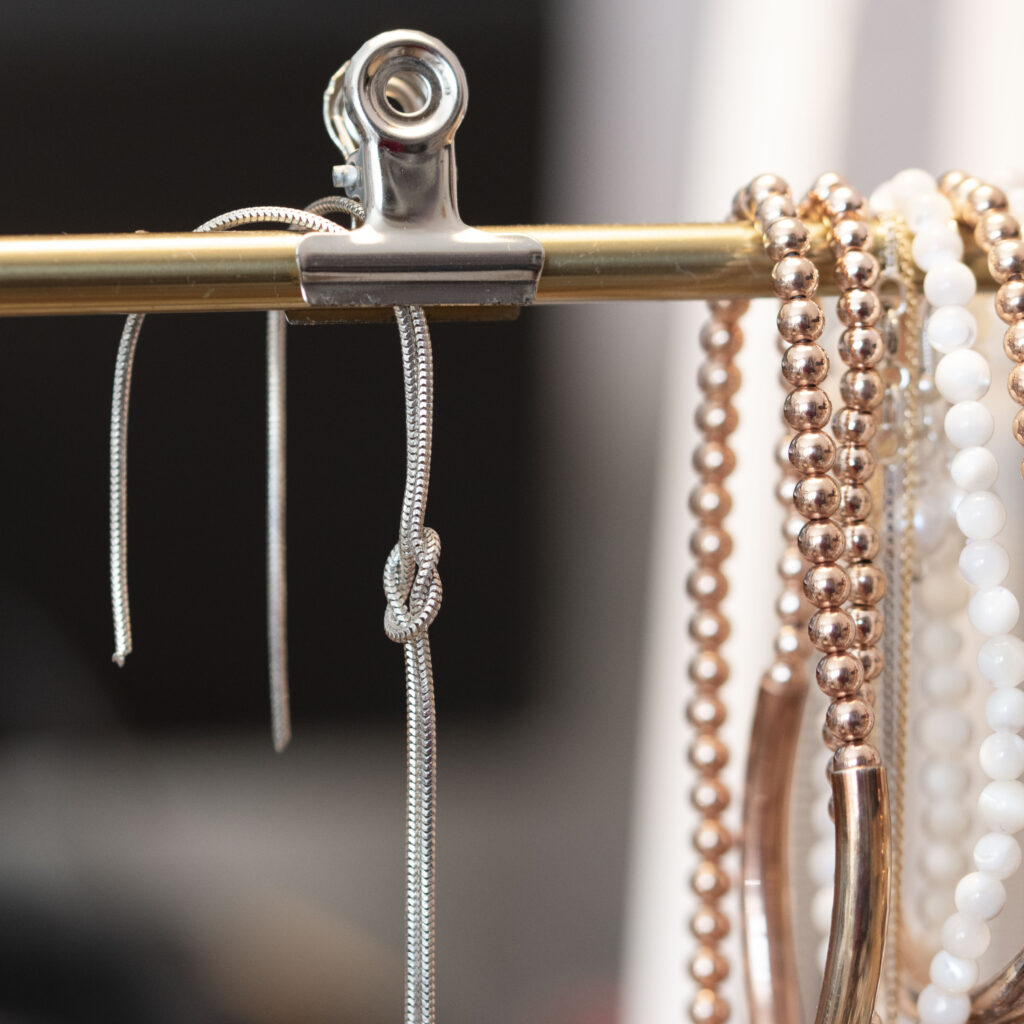
In my early days, I used to leave them to dry flat on the desk… rookie error 😏!!
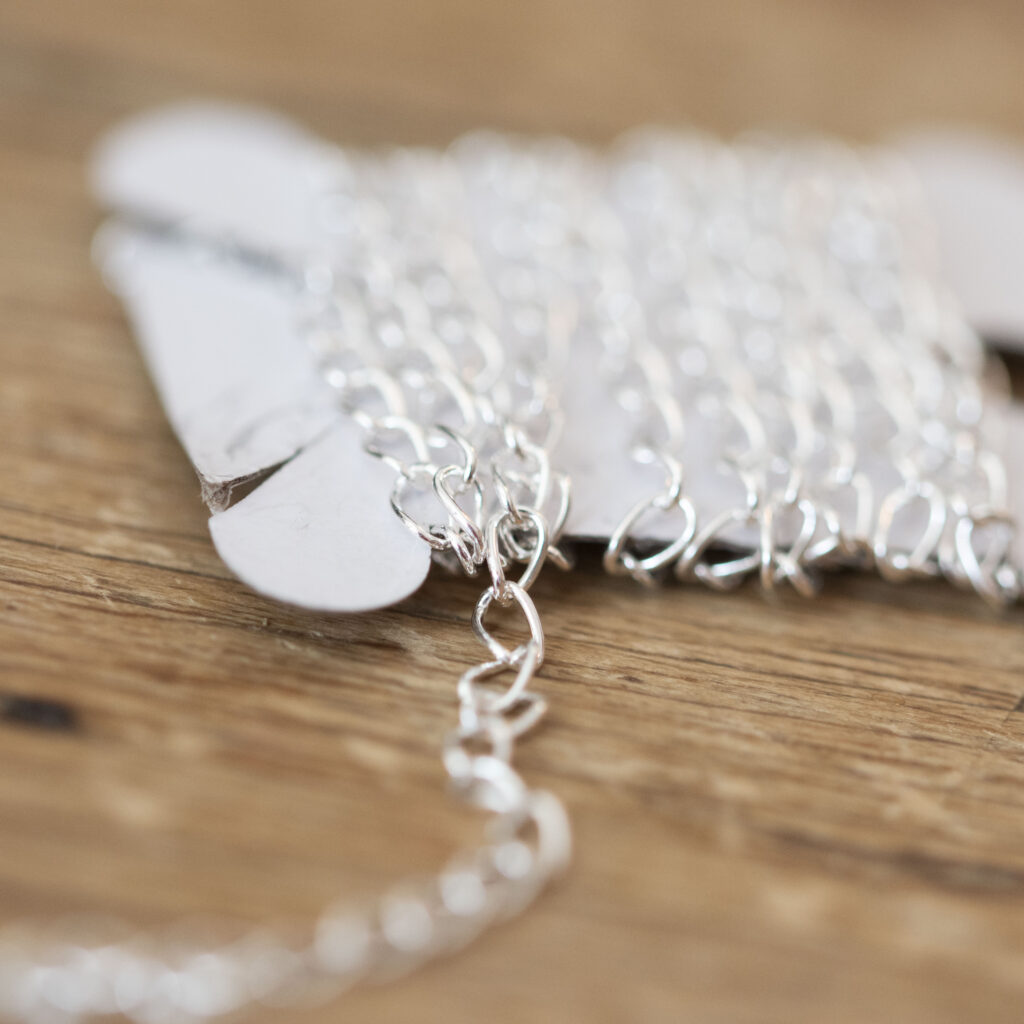
Now I hang them up to dry instead… mainly because I got tired of prizing them off my desk after they got stuck. I hang off my brass jewelry stand.
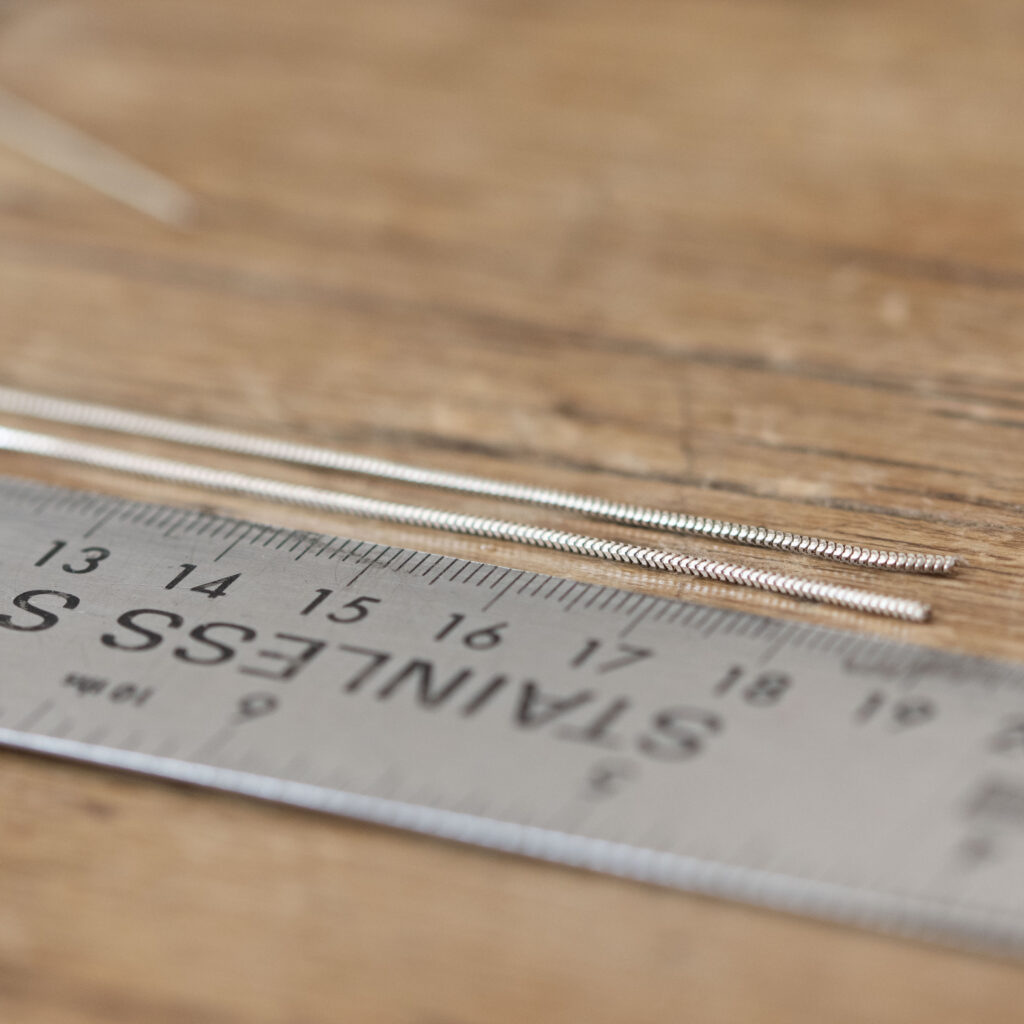
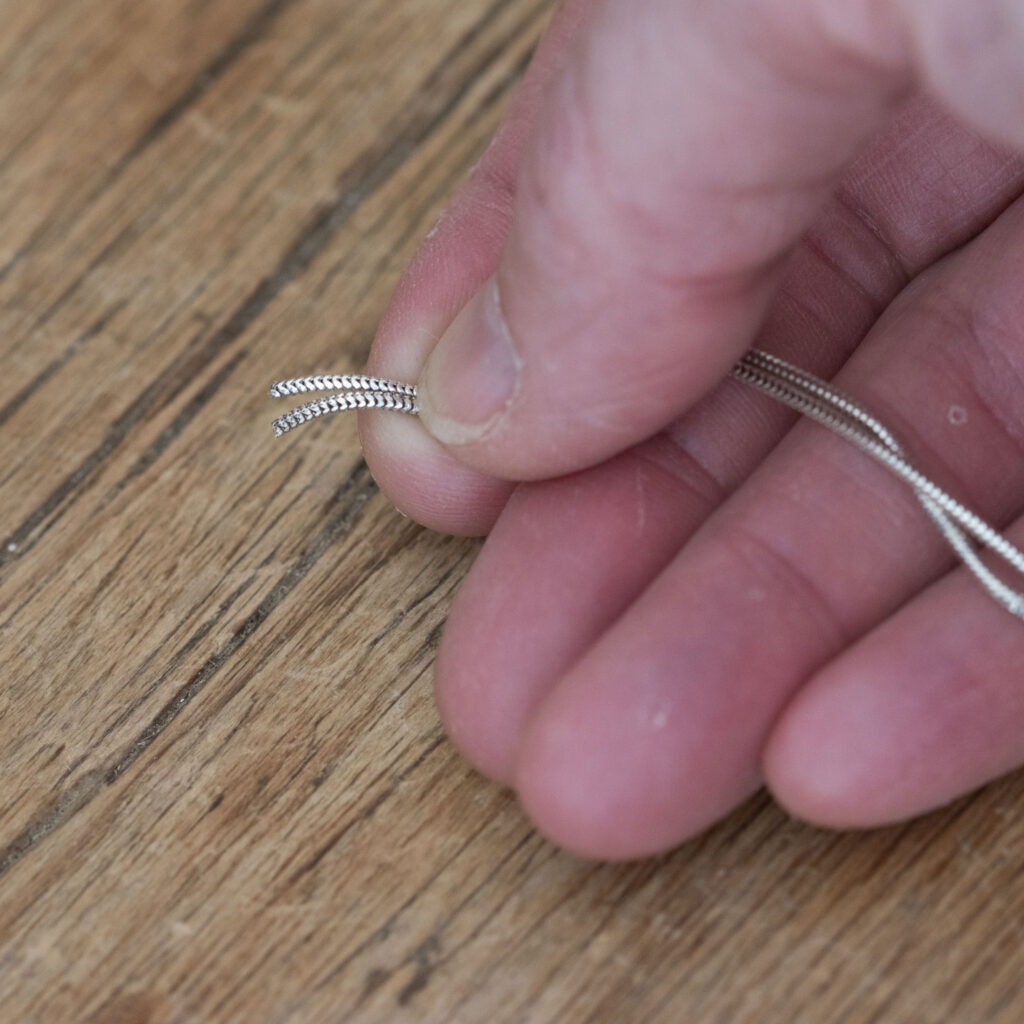
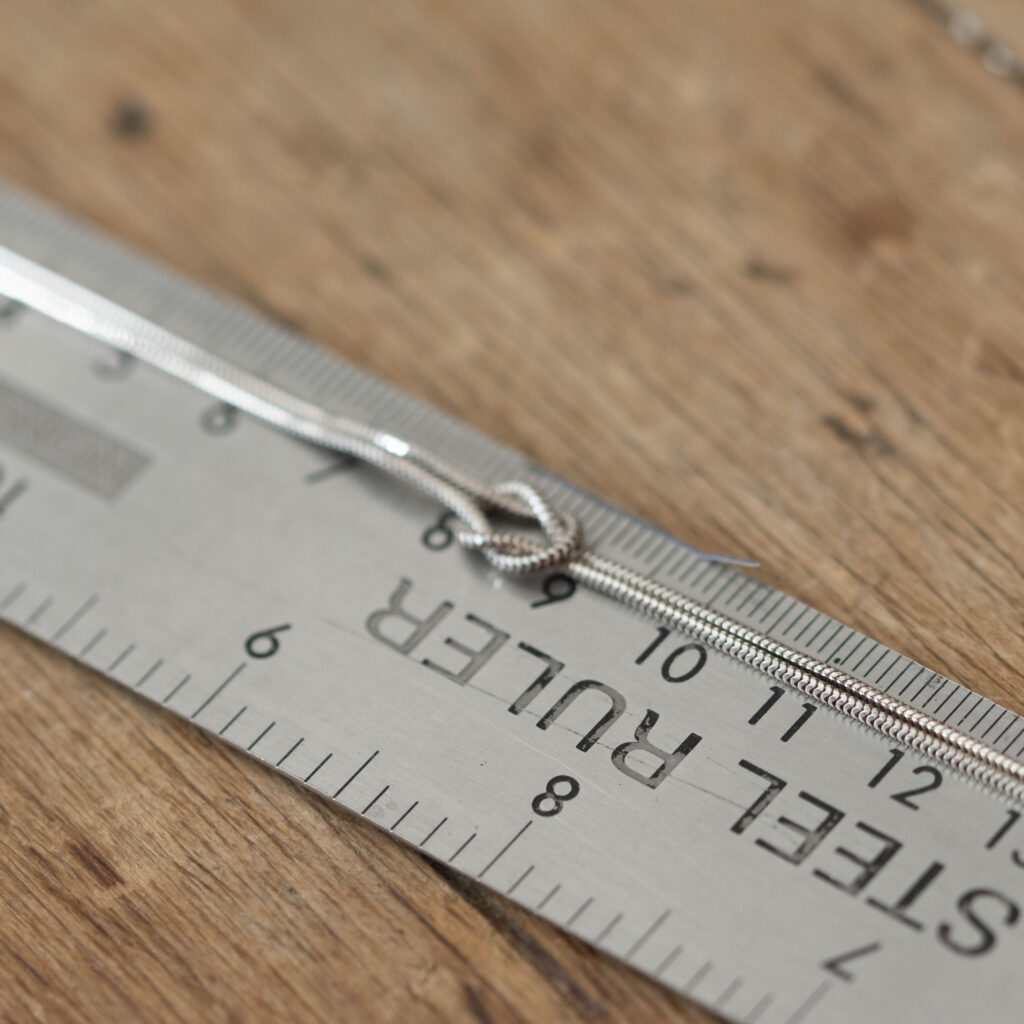
3. Measure & Trim
If you’re aiming for a 17cm bracelet, measure again once the knot is done. Your snake chain should be around 15cm, leaving roughly 1cm on each side for the clasp and jump rings to bring it up to size.
If you need to trim it down slightly, remember to trim both sides evenly so either side of the knot is the same length. It sounds obvious… but this is exactly the sort of thing you don’t notice until it’s annoyingly wonky and your knot is off centre.
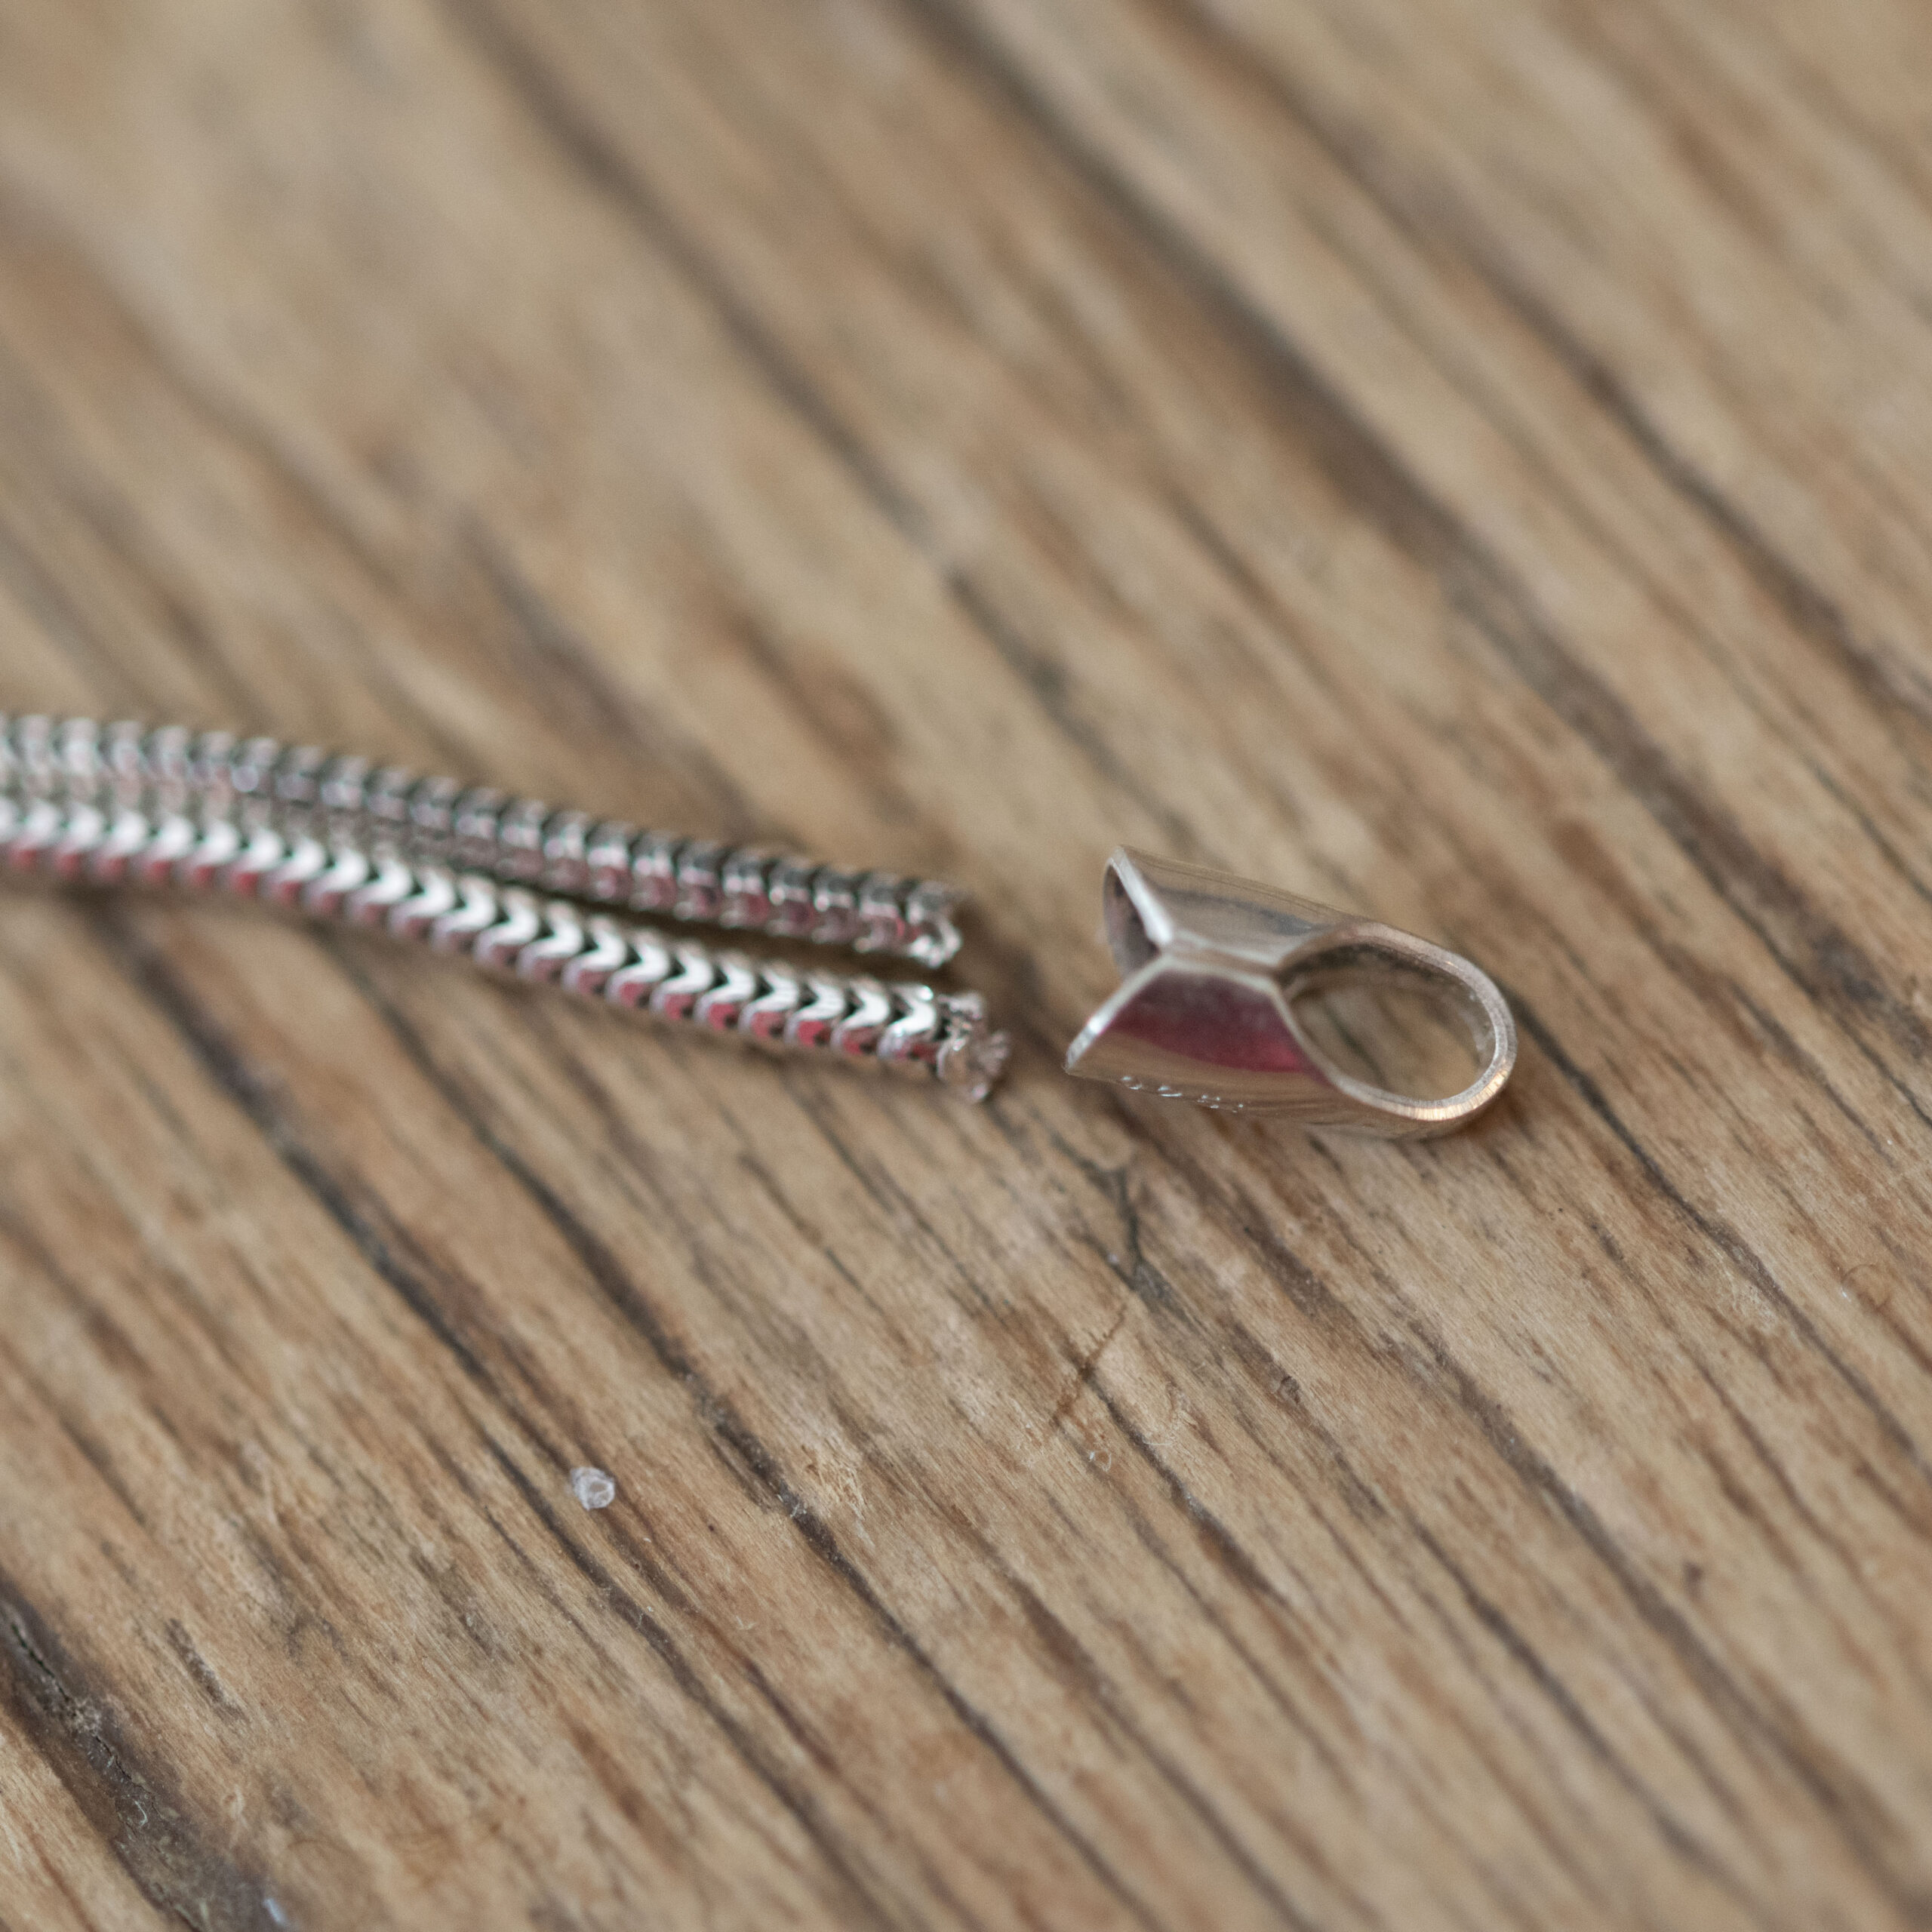
We are now going to add the end caps (see below). I have popped together a video of this bit as it’s a little bit fiddly to show in a static image.
Hang to dry again overnight if possible.
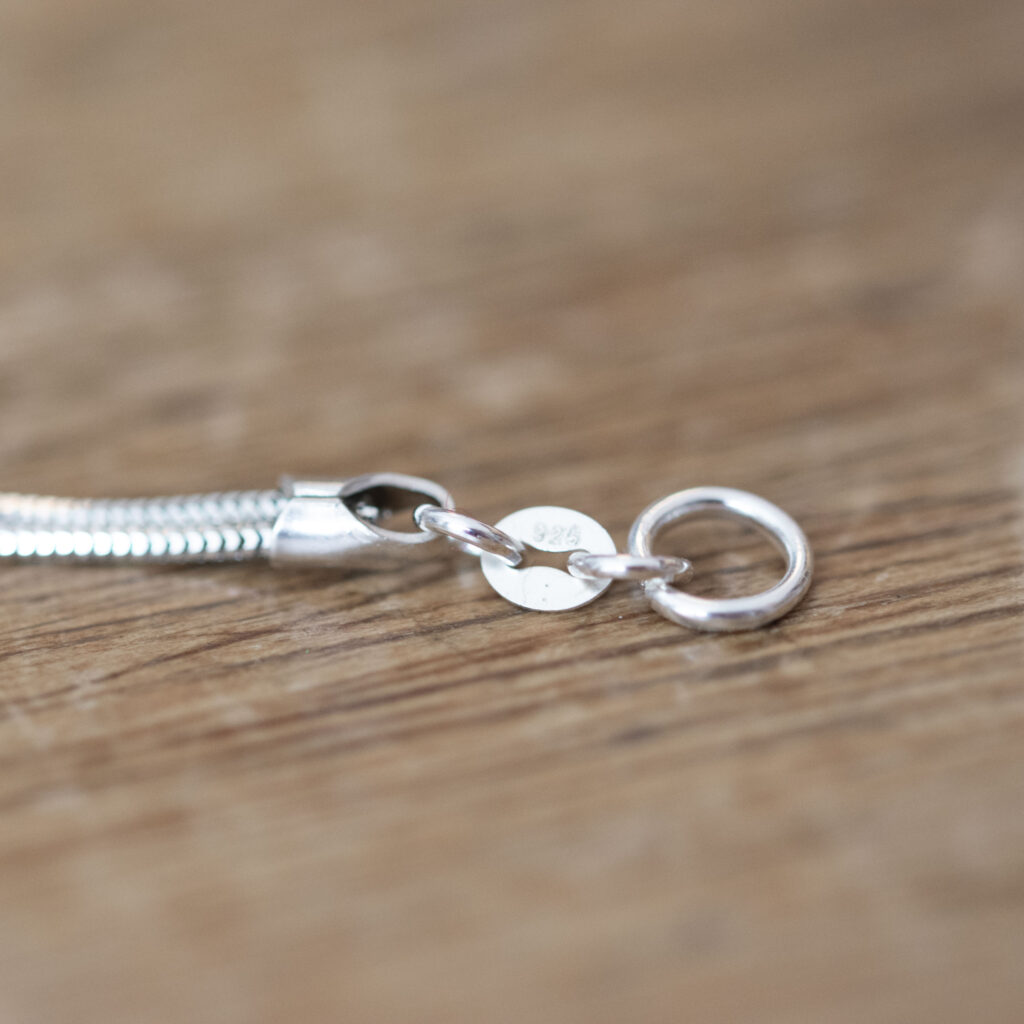
Once the knot and end caps are dry, attach your 10mm lobster clasp to one end. On the other, add a 4mm jump ring with your 925 tag, then finish with a 6mm jump ring.
I always use a heavier gauge for jump rings. Years of making have taught me that thin ones are about as useful as a chocolate teapot… so I stick to 18 gauge or thicker for strength and longevity.
Add your extender chain to give a little extra room. An extender is simply a short length of chain attached to the end of your bracelet, allowing the clasp to hook onto different links for an adjustable fit.
I always include one… far fewer “it doesn’t fit” moments coming back to haunt you.
I usually go for a 4cm extender, which takes a 17cm bracelet up to around 21cm, perfect if you want a bit of flexibility or you’re gifting and unsure of size.
I have these cute little mini heart charms that I add onto my entender chains, it just finishes it off nicely.
And just like that… you’ve turned a simple snake chain into something that has a boutique vibe!

RELATED READS
Humble Stacking Bracelet Recipe
How to Make An Adjustable Knot
Jewelry Making for Beginners
Stay up to date with my latest tutorials, designs, and my little jewelry-making obsessions by subscribing below…