Measuring Your Bracelets The Right Way
Bracelet Size vs Wrist Size Explained
Heads up! – I’ve included Amazon affiliate links in this post. If you choose to buy the same products as me through them, I may earn a teeny weeny commission (no extra cost to you though).
Have you ever measured a bracelet, made it exactly that size, and then wondered why it still didn’t fit properly?
Yep. Me too 🫣
For years, I assumed a 7-inch bracelet was simply… 7 inches.
But it turns out, bracelet sizing is a bit misleading.
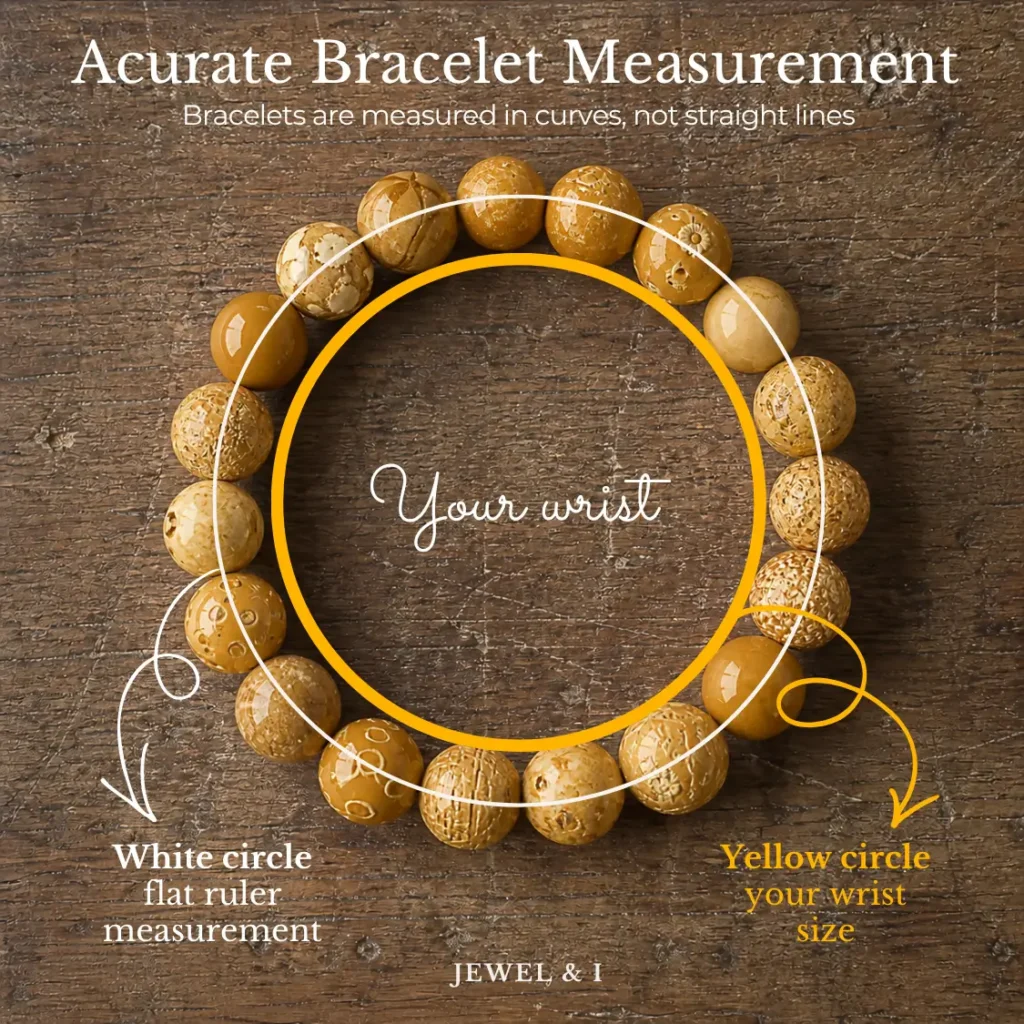
The thing that catches many jewelry makers out is that bracelets are usually measured in a straight line, but worn in a circle. Those two measurements are not the same thing at all.
I know 🤯
This little measurement quirk is one of those details that can be the difference between a bracelet that fits perfectly and one that ends up rattling around like a hula hoop on your wrist.

And!
because I’m the sort of person who gets ridiculously excited about bracelet sizing diagrams, I thought it deserved its own dedicated post.
The Measurement
So, you need to understand: Measuring a bracelet flat on a ruler isn’t the same as how it fits on a wrist.
When beads curve around your wrist (especially larger beads), the inside circumference becomes smaller than the flat measurement. So what looks like the ‘right length’ on the table can end up feeling too tight when worn. See the image below to hopefully explain a little better visually…
Still following?
So, What Should You Do Instead?
If you’ve got a willing wrist nearby, measure it by using a wrist measuring tool, tape measure, or even strip of paper.
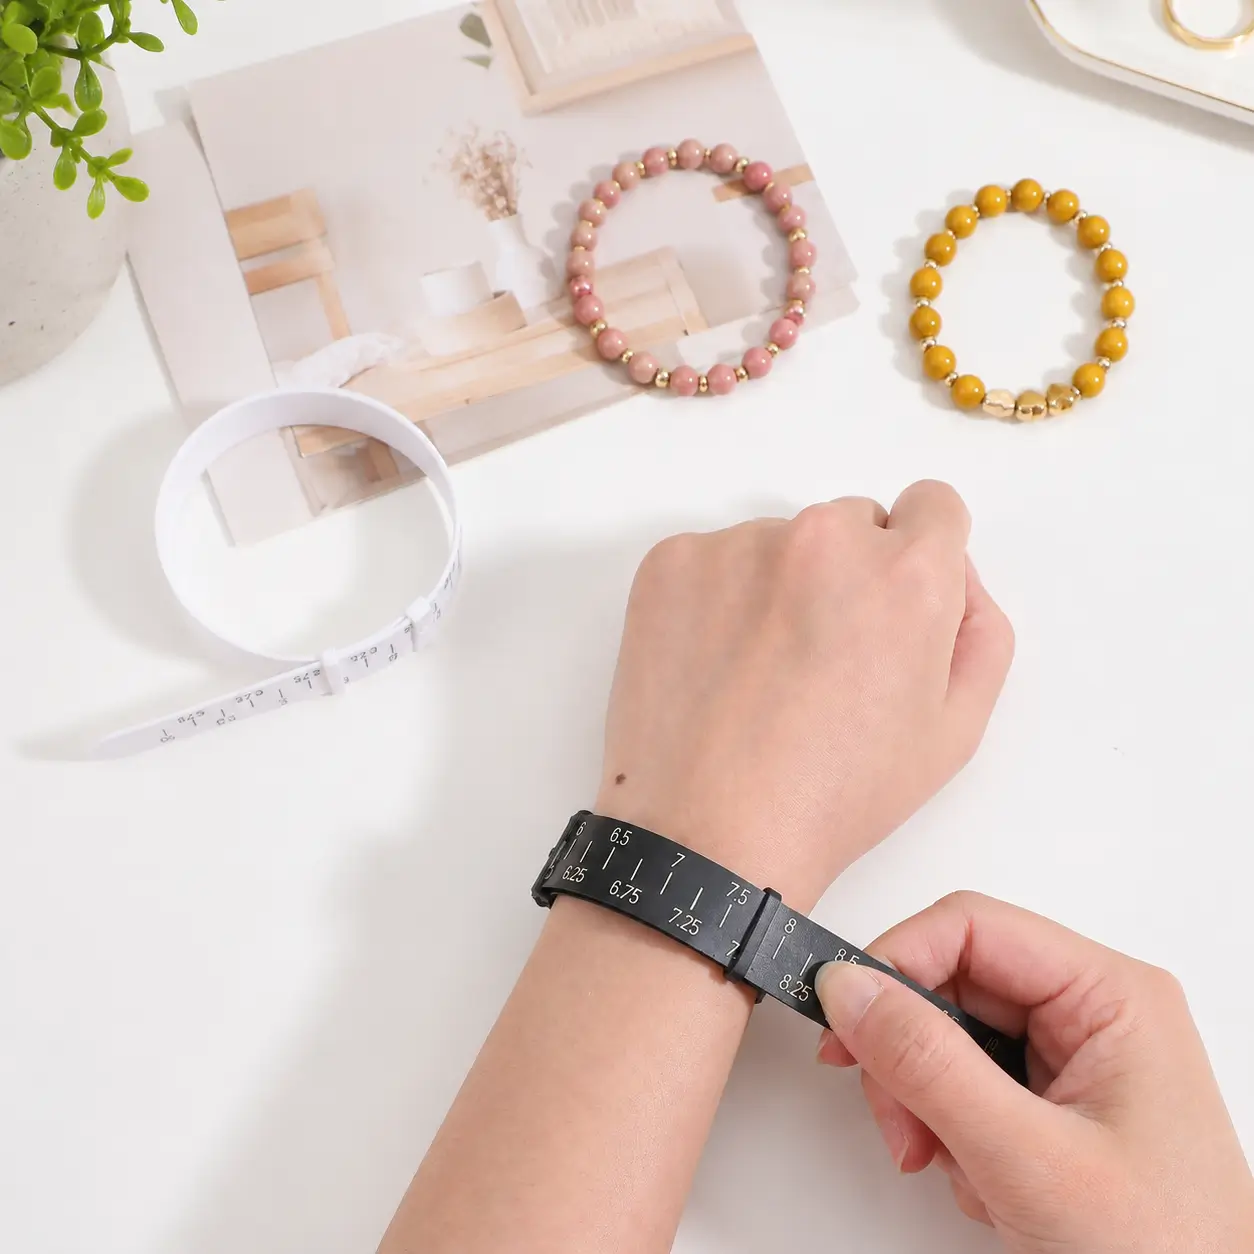
Then add a comfort allowance depending on how snug or loose you’d like the bracelet to fit.
- +1cm for snug
- +1.5–2cm for a standard fit
- +2cm+ for looser styles
For The Maker
If you’re a jewelry maker and make bracelets regularly, you’ll probably end up with a handful of standard sizes that you use again and again. For example, my stretch bracelets I typically make:
6.75″ (17cm) – Small Bracelet
7.5″ (19cm) – Standard Bracelet
8.25″ (21cm) – Large Bracelet
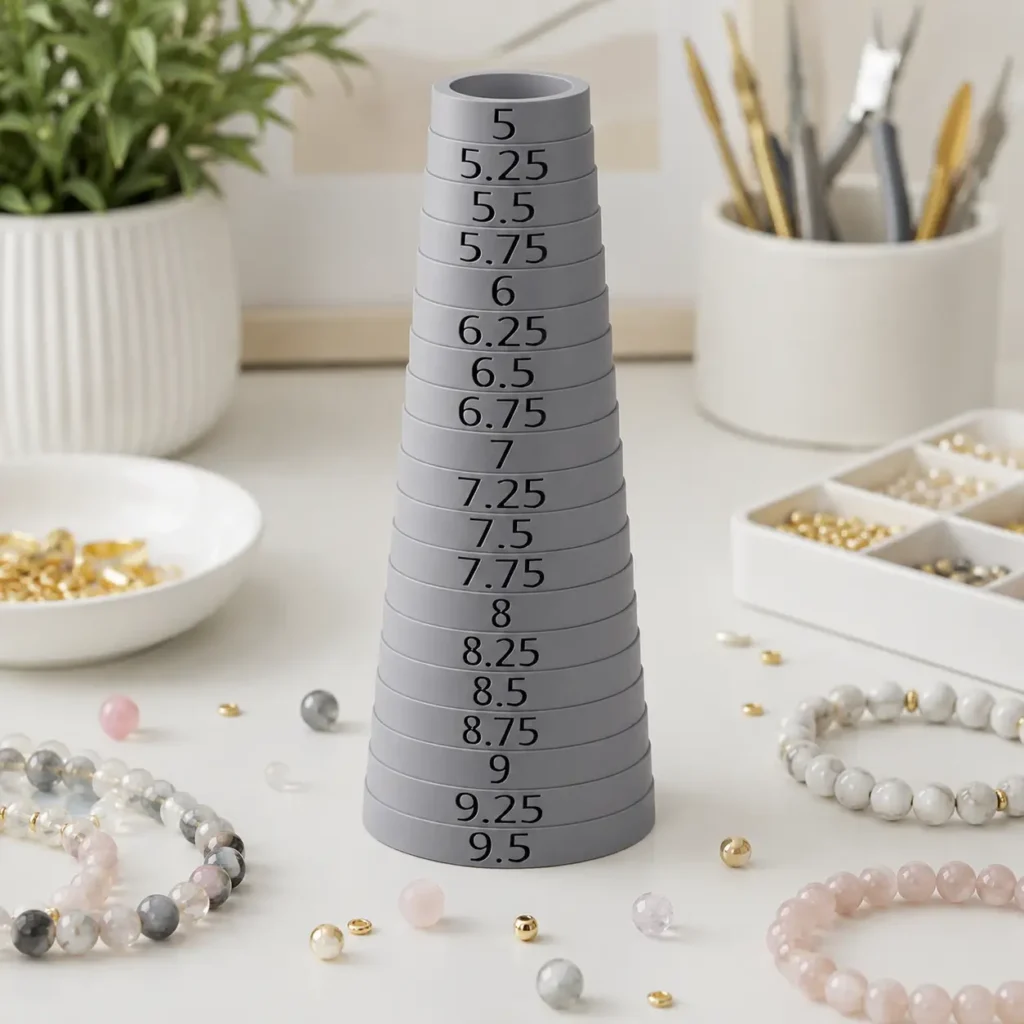
A bracelet mandrel sizer like the one below can be a really handy tool for checking your finished sizes and making sure you’re consistent every time around a curve.
For my day to day I tend to keep things even simpler and work from a bead count chart:
6.75″ (17cm) bracelet = 38 beads
7.5″ (19cm) bracelet = 40 beads
8.25″ (21cm) bracelet = 42 beads
Once you’ve made a few bracelets using the same bead size, you’ll quickly learn how many beads you need for each bracelet size, which makes sizing much faster and more accurate.
However, I do get asked very, very often to do bespoke sizes and grabbing a bracelet sizer mandrel comes in super handy for this.
Working With Wire
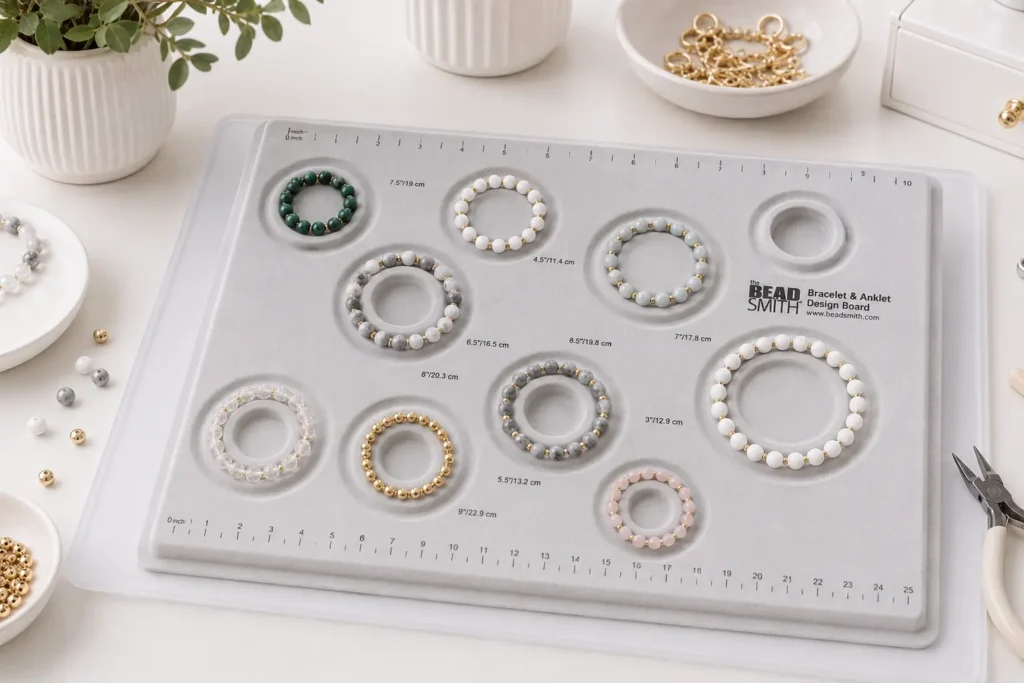
When you’re working with wire, clasps, jump rings, and all the other bits and bobs that go into a bracelet, these little bead boards (below) can be a lifesaver. They make it easy to lay out your design and check your measurements before you start assembling everything…
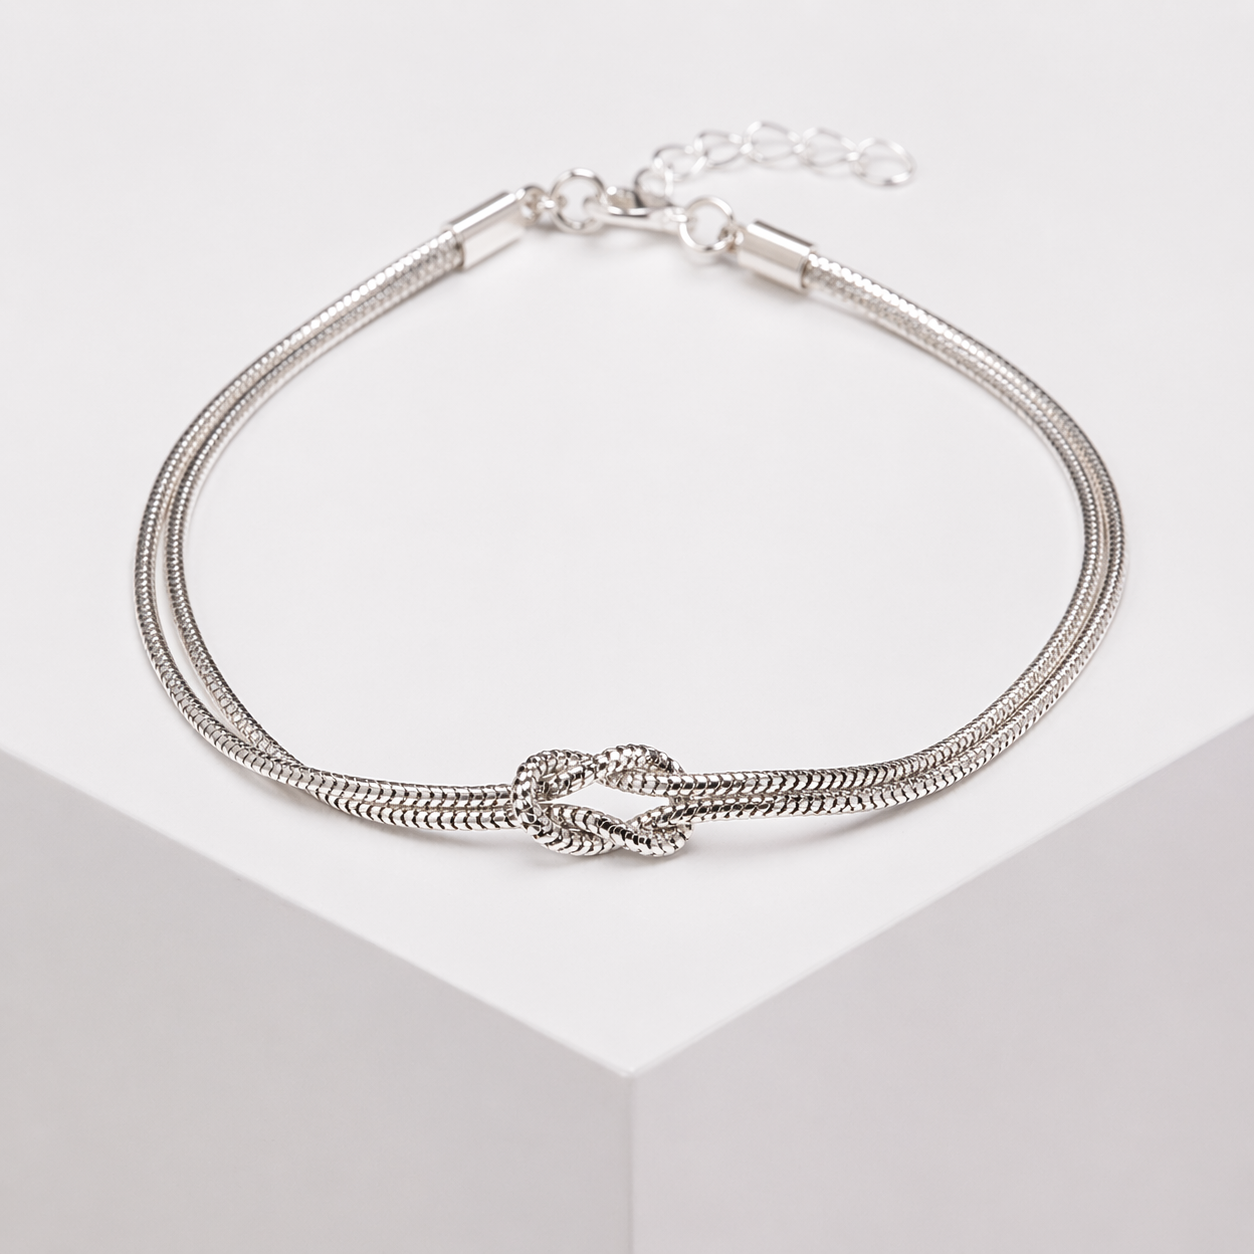
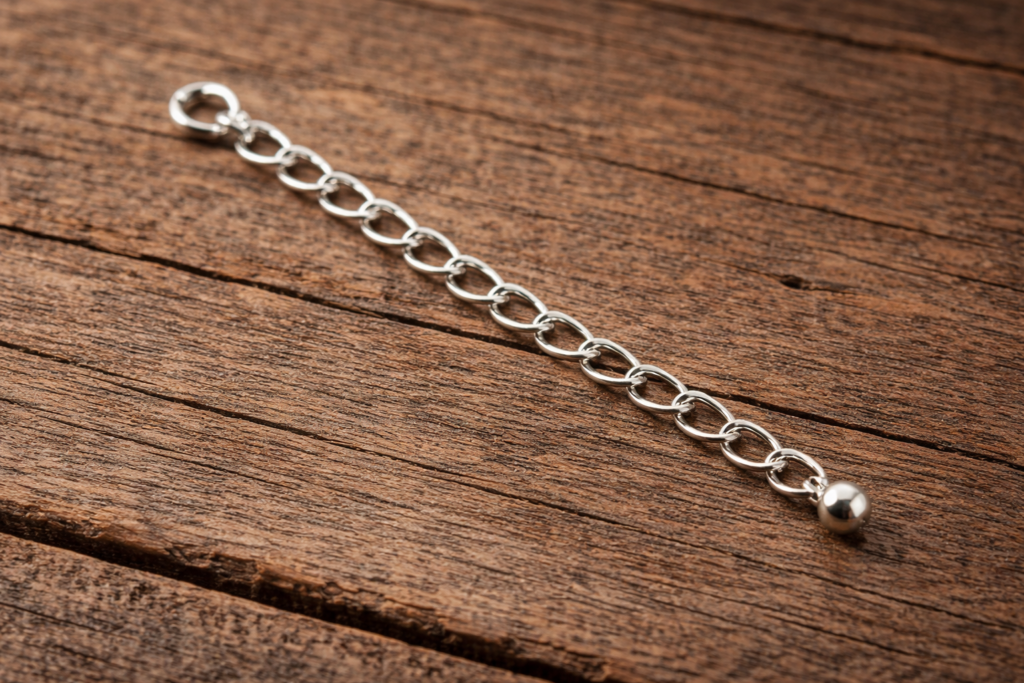
And, If needed, you can alway add an extender chain to your design. I add them to ALL my wire bracelets to fine-tune a bracelet fit.
Learn more about jewelry findings in my Findings blog post and download my FREE Findings Guide.
I hope this helps!

related reads
5 Details that instantly elevate your jewelry
Upgrade your stretch bracelets
Why Your Jewelry Isn’t Selling (+ how to fix it)
Best pliers for beginner jewelry makers
If your bracelets are nearly there… but not quite… I got you!
subscribe below for my Refinement Checklist and we’ll sort those little niggles out.